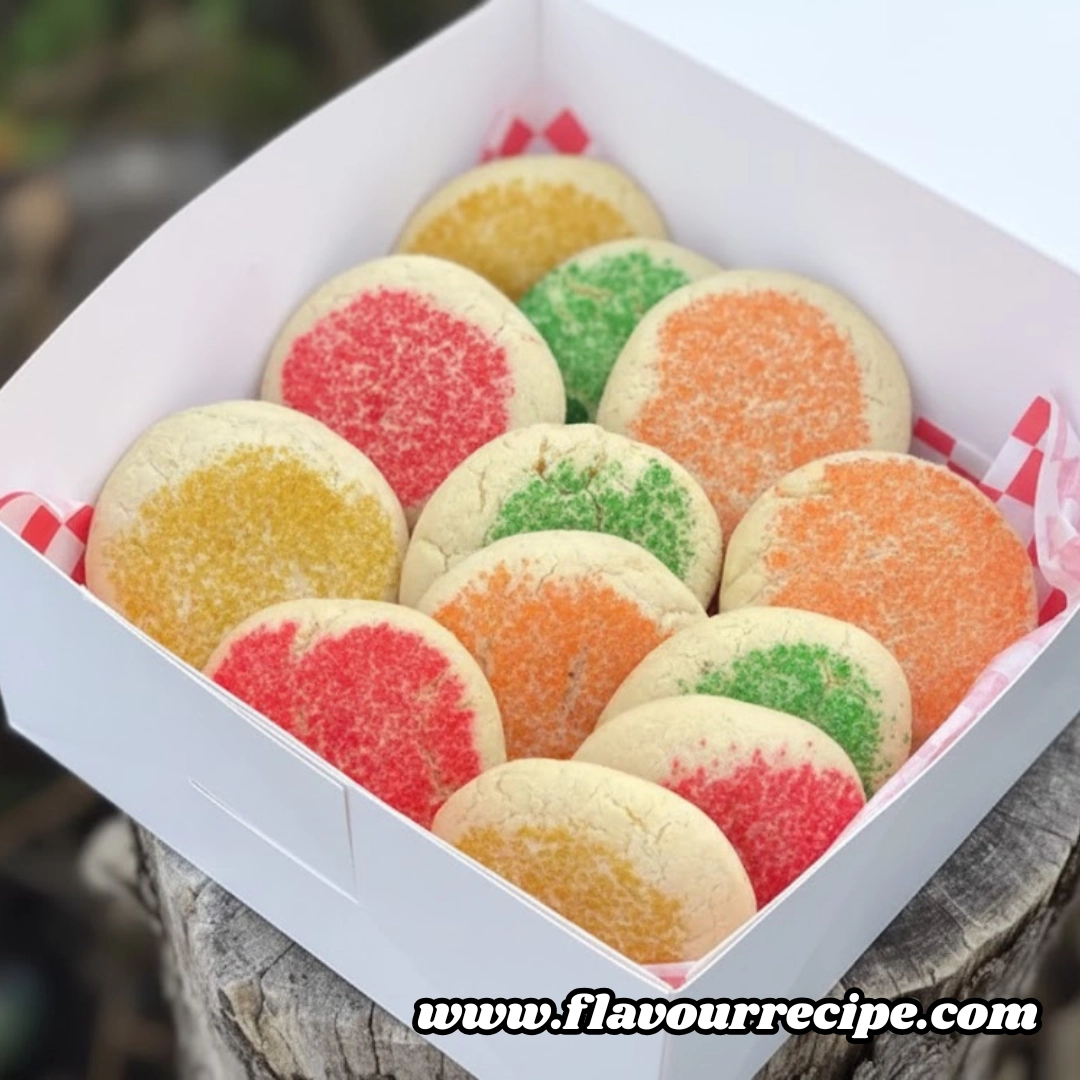
There is something profoundly nostalgic about a perfectly executed sugar cookie. It is the quintessential treat of childhood, yet it remains a sophisticated staple in the repertoire of any serious home baker. This specific recipe for Soft Sugar Cookies is designed to deliver that elusive, pillowy texture that melts in your mouth while maintaining enough structural integrity to hold a beautiful shape. Unlike thin, crispy wafers, these cookies are thick, tender, and incredibly satisfying. Whether you are preparing a batch for a neighborhood bake sale, a holiday gathering, or simply a rainy Tuesday afternoon, this recipe provides a foolproof foundation for a blue-ribbon-worthy dessert.
Table of Contents
The Essential Ingredient List
To achieve the hallmark softness of this recipe, it is vital to use the specific combination of fats and leaveners listed below. This balance ensures the cookies rise beautifully and remain tender for days.
- one third cup colored decorating sugar
- two thirds cup shortening
- two thirds cup unsalted butter, softened
- one and one half cups white sugar
- two large eggs
- two teaspoons vanilla extract
- three and one half cups all-purpose flour
- two teaspoons baking powder
- one teaspoon salt

Master Instructions for the Perfect Bake
Follow these steps with precision to ensure your cookies transition from the mixing bowl to the cooling rack with professional results.
- Begin by gathering all your ingredients to ensure a smooth workflow. Preheat your oven to 350 degrees Fahrenheit. Prepare your decorating sugar by placing it into a small bowl; if you are using multiple colors, separate them into individual small dishes.
- In the bowl of a heavy-duty stand mixer, combine the shortening and the softened unsalted butter. Beat these two fats together on medium speed for two to three minutes until the mixture is completely smooth, pale, and creamy.
- Add the white sugar to the fat mixture and continue to mix until fully incorporated.
- Introduce the large eggs one at a time. It is crucial to scrape down the sides of the bowl with a silicone spatula after each addition to ensure the emulsion is stable.
- Pour in the vanilla extract and mix briefly to distribute the aroma throughout the wet base.
- In a separate medium-sized mixing bowl, whisk together the all-purpose flour, baking powder, and salt. This step ensures the leavening agent is evenly distributed, preventing any bitter clumps.
- Set your mixer to its lowest speed and gradually add the dry flour mixture to the wet ingredients. Mix only until the dough just comes together and no streaks of white flour remain.
- Scoop and roll the dough into balls approximately the size of a walnut.
- Roll each individual dough ball into the decorating sugar until it is thoroughly coated.
- Place the sugar-coated balls onto ungreased cookie sheets, ensuring you leave at least two inches of space between each cookie to allow for spreading.
- Bake in the center of the preheated oven for 10 to 12 minutes. For the most even results, switch the position of the cookie sheets on the racks halfway through the baking time.
- Remove the cookies when the bottoms are a very light golden brown. Let them rest on the sheet for a minute before transferring them to wire racks to cool completely.

Achieving the Ultimate Tender Consistency
The secret to a “soft” sugar cookie lies in the intersection of chemistry and technique. This recipe utilizes a specific ratio of shortening to butter. While butter provides that indispensable, rich flavor that we all crave, shortening has a higher melting point. This means the cookies won’t spread too quickly in the oven, allowing the baking powder to lift the dough into a soft, cake-like dome rather than a flat disc.
Furthermore, the aeration of the fats is a critical first step. When you beat the shortening and butter for those initial three minutes, you are essentially creating thousands of tiny air pockets. During the baking process, the heat causes the carbon dioxide from the baking powder to expand into these pockets. If you rush the creaming stage, your cookies will likely turn out dense rather than pillowy.
Temperature management is another key factor. Ensure your eggs are at room temperature before adding them to the creamed butter. Cold eggs can cause the fat to seize and curdle, leading to an uneven crumb. If you find your kitchen is particularly warm and the dough feels overly sticky or oily, a brief fifteen-minute chill in the refrigerator can help the flour hydrate and make the rolling process much cleaner.
Deep Dive Into the Baking Process
The transition from a raw dough ball to a finished Soft Sugar Cookie is a fascinating transformation. As the trays enter the 350-degree Fahrenheit environment, the moisture in the eggs and butter begins to turn into steam. Simultaneously, the baking powder reacts with the heat, releasing gas. Because this dough is relatively sturdy, it holds these gases well, creating a structure that is airy but substantial.
When rolling the walnut-sized balls, try to handle the dough as little as possible. The heat from your hands can melt the fats prematurely, which might lead to a greasier exterior. If you prefer a flatter, more uniform cookie, you can use the bottom of a glass to gently press down on the sugared balls before they go into the oven. However, if you enjoy the rustic, slightly cracked “bakery look,” leave them as spheres; they will naturally settle into thick, beautiful rounds.
Watch the oven closely during the final two minutes. Sugar cookies are notorious for looking underdone when they are actually perfect. You are looking for “carry-over cooking” to do the heavy lifting. The edges should look set, and the bottoms should be the palest shade of tan. If the tops start to brown significantly, you have likely crossed the line into “crispy” territory. The wire rack is your best friend here—getting the cookies off the hot metal tray as soon as they are stable prevents the bottoms from becoming over-baked.
Accompaniments and Creative Serving Ideas
While these Soft Sugar Cookies are a triumph on their own, they serve as an excellent canvas for more elaborate presentations. For a classic “milk and cookies” experience, serve them slightly warm with a tall glass of ice-cold whole milk. The creaminess of the milk cuts through the sweetness of the sugar coating beautifully.
If you are hosting a party, these cookies make an incredible base for ice cream sandwiches. Take two completely cooled cookies and sandwich a scoop of premium vanilla bean or strawberry ice cream between them. Press gently so the ice cream reaches the edges, then roll the sides in sprinkles or crushed nuts.
For a more sophisticated afternoon tea, pair these cookies with a tart lemon curd or a sharp Earl Grey tea. The simple vanilla profile of the cookie complements the citrus and bergamot notes perfectly. You can also skip the colored decorating sugar and instead top the cooled cookies with a thin layer of almond-flavored glaze or a swirl of buttercream frosting for a truly decadent treat.
Tailoring the Recipe: Modifications and Substitutions
Baking is a science, but there is always room for a bit of personalization. If you do not have unsalted butter on hand, you can use salted butter, but be sure to reduce the added salt in the recipe to just a half teaspoon to maintain the flavor balance.
For those who want to experiment with different flavor profiles, the vanilla extract can be partially replaced with almond extract or even a bit of fresh citrus zest. Adding the zest of one lemon or orange to the sugar before rolling the dough balls creates a bright, aromatic crust that elevates the entire flavor profile.
If you find yourself without shortening, you can substitute it with an equal amount of butter, though be aware that the cookies will spread more and have a slightly crisper edge. For a more festive look, you can replace the white decorating sugar with cinnamon sugar (one part cinnamon to four parts sugar) to create a hybrid between a sugar cookie and a snickerdoodle.

Strategic Kitchen Wisdom for Success
One of the most common pitfalls in cookie baking is the measurement of flour. Most people scoop the measuring cup directly into the flour bag, which packs the flour down and leads to using too much. This results in a dry, crumbly cookie. Instead, use the “spoon and level” method: spoon the flour into the measuring cup until it overflows, then level it off with the back of a knife.
Another tip for maintaining that “soft” factor for several days is the bread trick. Once the cookies have cooled, place them in an airtight container with a single slice of plain white bread. The cookies will actually pull the moisture out of the bread, keeping them soft while the bread becomes stale. It is a simple piece of kitchen magic that works every time.
Lastly, pay attention to your cookie sheets. If you are baking in multiple batches, never place raw dough onto a hot cookie sheet. This will melt the fat instantly and ruin the texture. Always let your pans cool to room temperature or run them under cold water and dry them thoroughly before starting the next round.
Essential FAQ for Home Bakers
Can I prepare the dough in advance and bake it later?
Yes, this dough holds up remarkably well in the refrigerator. You can wrap the dough tightly in plastic wrap and store it for up to forty-eight hours. When you are ready to bake, let the dough sit at room temperature for about twenty minutes so it becomes pliable enough to roll into balls. This resting period also allows the flour to fully hydrate, often resulting in an even softer texture.
Why did my sugar cookies come out flat instead of puffy?
Flat cookies are usually the result of one of three things: the butter was too melted/soft when you started, the oven temperature was too low, or you over-mixed the dough after adding the flour. Ensure your butter is “cool-room temperature” (it should take a fingerprint but not be oily) and that your oven has been fully preheated for at least twenty minutes before the first tray goes in.
Is it possible to freeze these cookies after they are baked?
Absolutely. These cookies freeze beautifully. Once they are completely cooled, layer them in a freezer-safe container with parchment paper between the layers. They will stay fresh for up to three months. To serve, simply let them thaw at room temperature for about an hour. They maintain their soft texture surprisingly well even after being frozen.
What if I don’t have a stand mixer?
While a stand mixer makes the creaming process easier, you can certainly make these with a hand-held electric mixer or even by hand with a sturdy wooden spoon and some elbow grease. The key is ensuring the shortening, butter, and sugar are beaten until they are noticeably lighter in color and fluffy in texture. If mixing by hand, this may take five to seven minutes of vigorous stirring.
Nutrient Profile and Dietary Overview
Understanding the nutritional breakdown can help you fit these treats into a balanced lifestyle. The following values are estimates based on a yield of twenty-four cookies.
| Nutrient | Amount Per Serving |
| Calories | 226 |
| Total Fat | 11 grams |
| Saturated Fat | 5 grams |
| Cholesterol | 30 milligrams |
| Sodium | 165 milligrams |
| Total Carbohydrates | 29 grams |
| Dietary Fiber | 1 gram |
| Sugars | 16 grams |
| Protein | 3 grams |
Dietary Disclaimer
The nutritional information provided is an estimate based on standard ingredients and should be used for general informational purposes only. Actual nutritional content may vary depending on specific brands used and slight variations in portion sizes.
Final Thoughts on This Classic Recipe
Perfecting the soft sugar cookie is a journey every baker should take. This recipe strips away the complexity of chilled cut-out doughs and replaces it with a straightforward, high-reward process that emphasizes texture and pure vanilla flavor. The combination of butter for taste and shortening for structure creates a cookie that remains soft long after it leaves the oven. By following the creaming techniques and being mindful of your bake times, you will produce a batch of cookies that rivals any high-end bakery. These treats are more than just a dessert; they are a warm, sweet reminder of the simple joys of home baking.
PrintThe Ultimate Bakery Style Soft Sugar Cookies

These blue-ribbon soft sugar cookies are pillowy, tender, and melt-in-your-mouth delicious. A perfect blend of butter and shortening ensures they stay soft for days!
- Prep Time: 15 mins
- Cook Time: 10 mins
- Total Time: 25 mins
- Yield: 24 cookies 1x
- Category: Dessert
- Method: Baking
- Cuisine: American
- Diet: Vegetarian
Ingredients
1/3 cup colored decorating sugar
2/3 cup shortening
2/3 cup unsalted butter, softened
1 1/2 cups white sugar
2 large eggs
2 teaspoons vanilla extract
3 1/2 cups all-purpose flour
2 teaspoons baking powder
1 teaspoon salt
Instructions
1. Preheat oven to 350 degrees Fahrenheit. Prepare decorating sugar in small bowls.
2. Beat shortening and butter until smooth and creamy (2-3 mins).
3. Mix in sugar, then add eggs one at a time, followed by vanilla.
4. Whisk flour, baking powder, and salt in a separate bowl.
5. Gradually add dry ingredients to wet and mix until dough forms.
6. Roll dough into walnut-sized balls and coat in decorating sugar.
7. Place 2 inches apart on ungreased sheets.
8. Bake for 10-12 minutes until bottoms are light brown. Cool on wire racks.
Notes
Do not overbake; the cookies should look pale on top to stay soft.
Use the spoon-and-level method for measuring flour to avoid dry cookies.
Store with a slice of bread in the container to maintain moisture.
Nutrition
- Serving Size: 1 cookie
- Calories: 226
- Sugar: 16g
- Sodium: 165mg
- Fat: 11g
- Saturated Fat: 5g
- Unsaturated Fat: 6g
- Trans Fat: 0g
- Carbohydrates: 29g
- Fiber: 1g
- Protein: 3g
- Cholesterol: 30mg


