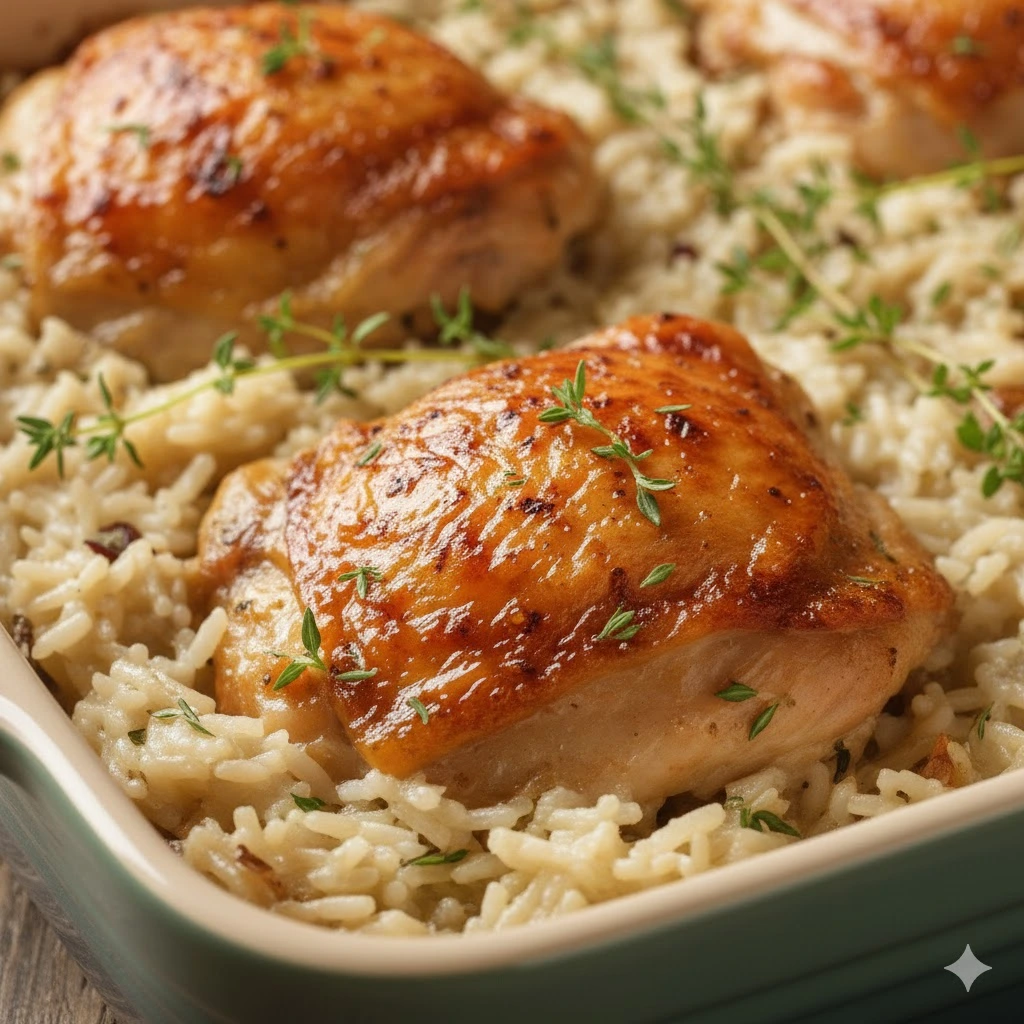
Achieving the perfect oven-roasted poultry is a fundamental skill that transforms a basic protein into a versatile cornerstone for dozens of different meals. While many home cooks have struggled with meat that turns out dry or rubbery, mastering a few specific techniques ensures a consistent, high-quality result every time you step into the kitchen. This approach focuses on moisture retention and high-heat roasting to produce Simple Baked Chicken Breasts that remain incredibly tender on the inside while developing a savory, golden exterior. Whether you are preparing a formal dinner or prepping protein for the week ahead, these methods provide a reliable foundation for success.
Table of Contents
Ingredients
The Protein
- Four boneless, skinless chicken breasts: Aim for pieces that are relatively uniform in size, or pound them to an even thickness of about one inch.
The Brine
- One-fourth cup kosher salt: Used to create a quick saline solution that seasons the meat deeply.
- Four cups water: Divided into lukewarm and cold portions to manage temperature.
Fat and Flavor
- One tablespoon melted butter or olive oil: Butter provides a richer flavor and better browning, while olive oil offers a cleaner profile.
- One teaspoon kosher salt: For the final surface seasoning.
- One-half teaspoon freshly ground black pepper: Adds a subtle heat and floral note.
- One-half teaspoon garlic powder: Provides a savory, aromatic depth.
- One-half teaspoon smoked paprika: Lends a beautiful golden color and a hint of earthiness.

Instructions
- Prepare the Brine: Dissolve the salt in two cups of warm water, then add two cups of cold water to bring the temperature down.
- Submerge the Meat: Place the chicken in the salt water for fifteen to thirty minutes.
- Dry Thoroughly: Remove the chicken, rinse under cold water, and pat completely dry with paper towels.
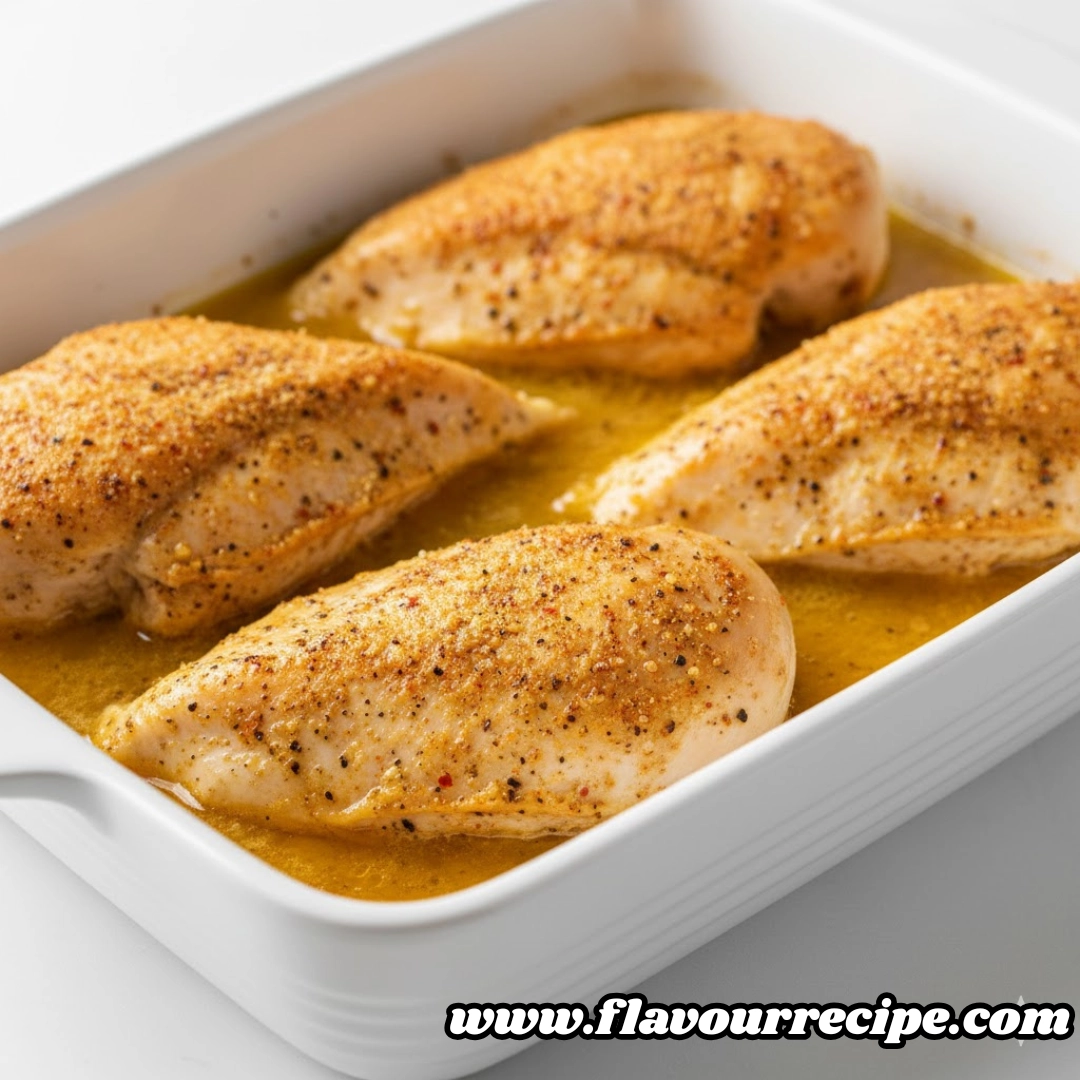
- Preheat and Prep: Set your oven to four hundred fifty Fahrenheit and lightly grease a metal roasting pan or rimmed baking sheet.
- Apply the Coating: Brush both sides of the breasts with your chosen fat and sprinkle the spice blend evenly over the surface.
- Roast: Place the pan in the center of the oven and bake for fifteen to eighteen minutes.
- Check Temperature: Ensure the internal temperature reaches one hundred sixty-five Fahrenheit at the thickest part.
- Rest: Transfer the meat to a cutting board or warm plate and cover loosely with foil for five to ten minutes before slicing.
Step-by-Step Details
The Importance of the Soak
Brining is the most effective way to protect lean poultry from the intense heat of the oven. By soaking the meat in a salt solution, you are essentially “pre-loading” the cells with moisture. As the salt penetrates the fibers, it breaks down some of the tough proteins, allowing the meat to hold onto more liquid during the roasting process. You will notice the meat looks slightly more opaque and feels firmer after this step. Just be sure to pat the surface bone-dry afterward; any lingering moisture on the skin will steam the meat rather than sear it.
High Heat for Better Texture
While it might seem counterintuitive to cook lean meat at four hundred fifty Fahrenheit, this high temperature is the secret to a superior crust. A lower temperature often results in the meat sitting in the oven for too long, which slowly saps the interior of its juices. High heat works quickly, caramelizing the fats and spices on the outside while the center finishes cooking just as it reaches the peak of juiciness. You are looking for a light golden hue and a surface that looks taut and glistening.
Evaluating Doneness
The most common mistake in poultry preparation is relying on visual cues alone. Cutting into the meat to check for “clear juices” actually creates an escape route for the very moisture you worked so hard to preserve. Instead, use a digital probe. Once the sensor reads one hundred sixty-five Fahrenheit, the meat is safe and perfectly cooked. If you prefer a more charred look, you can engage the broiler for the final sixty seconds, but stay vigilant to prevent the spices from burning.
The Resting Phase
When meat is exposed to heat, the muscle fibers tighten and push juices toward the center. If you slice into a breast immediately after removing it from the oven, those juices will spill out onto the board. By allowing the Simple Baked Chicken Breasts to rest under a foil tent, the fibers begin to relax and reabsorb that liquid. This five-to-ten-minute window is the difference between a meal that feels “fine” and one that feels truly professional.

Pro Tips
- Uniformity is Key: If one end of your breast is significantly thicker than the other, use a meat mallet or the bottom of a heavy skillet to level it out. This ensures the entire piece finishes at the exact same time.
- Avoid Glass Dishes: At four hundred fifty Fahrenheit, glass or ceramic dishes can be prone to thermal shock or may simply not conduct heat as efficiently as metal. A heavy-duty aluminum or stainless steel sheet pan is your best bet for even browning.
- Rinse the Brine: Never skip the rinse after brining. If you don’t wash off the excess surface salt, the final dish may taste unpleasantly salty regardless of how much spice you add.
- Room Temperature Start: If time permits, let the chicken sit on the counter for about ten minutes after brining and drying. Taking the “chill” off the meat helps it cook more evenly from edge to center.
- Fresh Spices: Spices lose their potency over time. Ensure your paprika and garlic powder are fresh to get that vibrant color and pungent aroma that makes the crust so appealing.
- Check the Label: Some modern supermarket poultry is “enhanced” with a salt solution at the factory. If the packaging mentions a high percentage of sodium solution, you can skip the brining step entirely.
Variations or Substitutions
- Mediterranean Herb: Swap the paprika and garlic for a blend of dried oregano, dried thyme, and lemon zest. Brush with extra virgin olive oil for a bright, citrusy finish.
- Spicy Southwestern: Replace the spice blend with chili powder, cumin, and a pinch of cayenne pepper. This version works exceptionally well for taco fillings or taco salads.
- Dijon Crust: Instead of just oil or butter, whisk a teaspoon of Dijon mustard into the melted fat before brushing it on. The mustard adds a sharp tang and helps the spices adhere.
- Everything Seasoning: For a crunchy, toasted texture, use a store-bought “everything bagel” blend. Since these blends usually contain salt, reduce the kosher salt in your rub accordingly.
Serving Suggestions
- The Classic Roast: Serve the breasts whole alongside a pile of roasted root vegetables like carrots and parsnips. The juices from the chicken will naturally season the veggies on the plate.
- Protein-Packed Greens: Slice the warm chicken into thick medallions and lay them over a bed of crisp Romaine or massaged kale. Add a creamy dressing to complement the smoky paprika notes.
- Grain Bowl Base: Dice the chicken and toss it into a bowl of quinoa or farro with steamed broccoli and a drizzle of tahini sauce for a balanced, prep-friendly lunch.
FAQs
Can I use this method for bone-in chicken breasts?
Bone-in breasts require significantly more time in the oven, usually thirty to forty minutes. While the brining technique still works excellently for them, you would need to lower the temperature to four hundred Fahrenheit to prevent the skin from burning before the bone-side meat is fully cooked.
How long will the leftovers stay fresh in the refrigerator?
When stored in an airtight container, these chicken breasts will maintain their quality for up to three days. For the best results when reheating, do so gently in a pan with a splash of water or broth to prevent the meat from drying out.
Is it safe to freeze cooked chicken breasts?
Yes, you can freeze the cooked meat for up to three months. It is often helpful to slice or shred the chicken before freezing so that it can be dropped directly into soups, stews, or pasta dishes once thawed.
What if I don’t have time to brine?
If you are in a rush, you can skip the brine, but you should compensate by being extremely careful not to overcook the meat. Pull the chicken the second it hits one hundred sixty-five Fahrenheit to ensure it stays as moist as possible without the extra help of the salt soak.
Nutrition Information
| Nutrient | Amount per Serving |
| Calories | 245 kcal |
| Protein | 38 g |
| Carbs | 1 g |
| Fat | 9 g |
| Fiber | 0 g |
| Sugar | 0 g |
| Sodium | 680 mg |
Disclaimer
Nutrition information is an estimate and may vary based on preparation and ingredients used.
PrintSimple Baked Chicken Breasts

Master the art of Simple Baked Chicken Breasts with this easy 5-step method. Learn how to brine and roast chicken to perfection for juicy, flavorful results.
- Prep Time: 20 mins
- Cook Time: 18 mins
- Total Time: 38 mins
- Yield: 4 servings 1x
- Category: Main Course
- Method: Oven
- Cuisine: American
Ingredients
4 boneless skinless chicken breasts
1/4 cup kosher salt (for brine)
4 cups water
1 tablespoon melted butter or olive oil
1 teaspoon kosher salt
1/2 teaspoon freshly-ground black pepper
1/2 teaspoon garlic powder
1/2 teaspoon smoked paprika
Instructions
1. Prepare the Brine: Dissolve salt in lukewarm water then add cold water.
2. Submerge Meat: Soak chicken for 15 to 30 minutes.
3. Dry Thoroughly: Rinse chicken and pat bone-dry with paper towels.
4. Preheat: Set oven to 450 Fahrenheit.
5. Season: Brush with fat and apply spice rub evenly.
6. Roast: Bake for 15 to 18 minutes until internal temp is 165 Fahrenheit.
7. Rest: Tent with foil for 5 to 10 minutes before slicing.
Notes
Always use a metal baking sheet for better browning at high heat.
Don’t skip the rest period; it’s vital for juiciness.
If chicken is pre-brined from the store, skip the salt soak step.
Nutrition
- Serving Size: 1 breast
- Calories: 245
- Sugar: 0g
- Sodium: 680mg
- Fat: 9g
- Saturated Fat: 4g
- Unsaturated Fat: 5g
- Trans Fat: 0g
- Carbohydrates: 1g
- Fiber: 0g
- Protein: 38g
- Cholesterol: 95mg