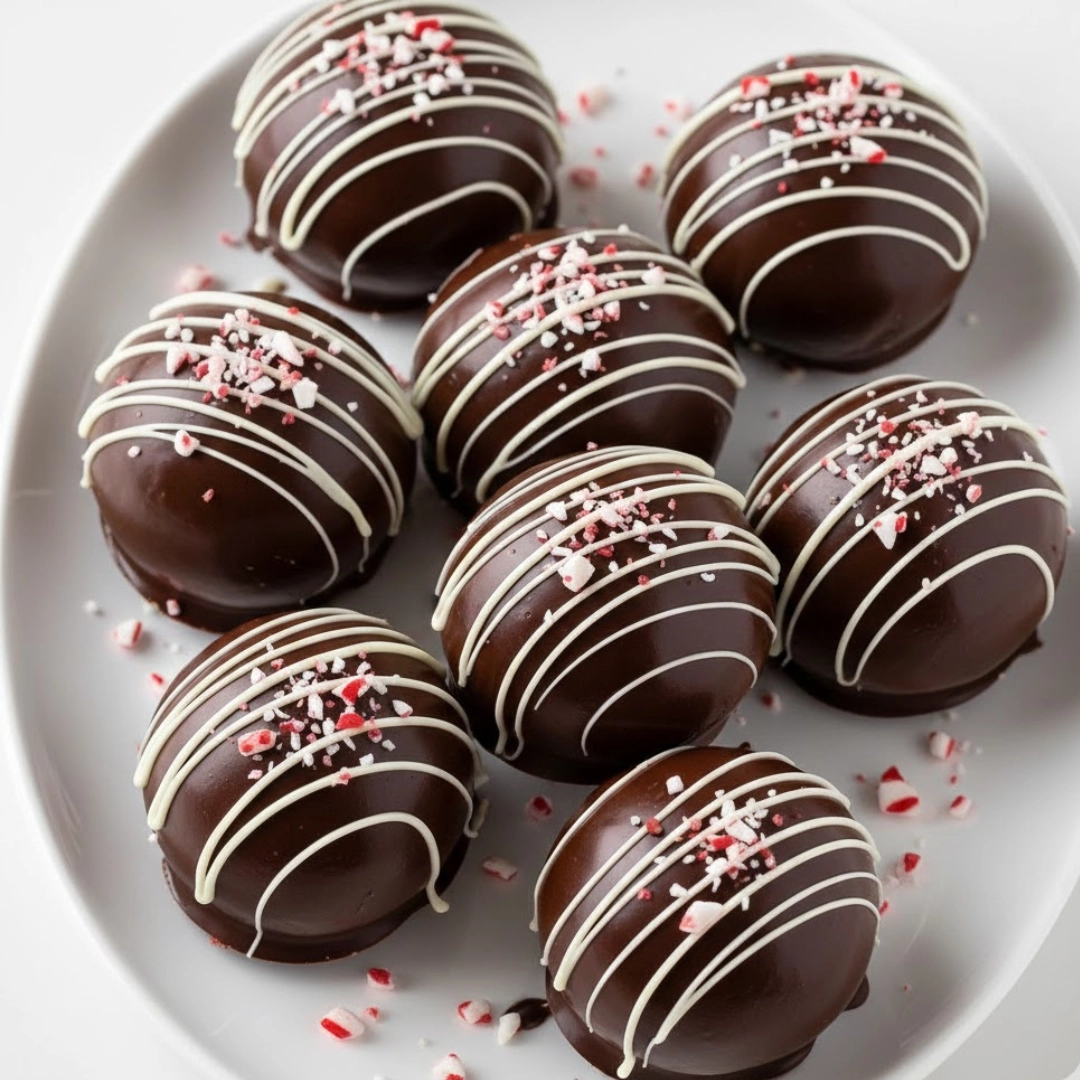
The winter holidays call for specific, nostalgic flavors, and few pairings are as instantly recognizable and comforting as the marriage of rich cocoa, bold coffee, and cool, vibrant mint. This recipe for Peppermint Mocha Cake Balls elevates that classic seasonal profile into an elegant, handheld confection perfect for any sophisticated holiday gathering. Forget dry, crumbly truffles; this approach starts with a deeply moist, from-scratch mocha cake, binding it with a tangy cream cheese and peppermint frosting for unparalleled depth of flavor. These glossy, crackling chocolate spheres are small in stature but immense in seasonal cheer, providing that necessary jolt of coolness against the warmth of dark chocolate. They are ideal for passing around at a cocktail party or tucking into cellophane bags as a homemade gift.
Table of Contents
The Essential Components: What You Need to Create Perfection
Achieving the ideal structure and flavor requires careful selection of ingredients, ensuring the mocha base is pronounced and the peppermint element is refreshing, not overpowering.
For the Mocha Cake Base
- All-Purpose Flour: 2 cups (240 grams)
- Granulated Sugar: 2 cups (400 grams)
- Unsweetened Cocoa Powder (natural or Dutch-process): three-quarters cup (75 grams)
- Baking Soda: 1 teaspoon
- Salt: 1 teaspoon
- Large Eggs: 2, at room temperature
- Buttermilk: 1 cup (240 milliliters)
- Vegetable Oil: one-half cup (120 milliliters)
- Vanilla Extract: 1 teaspoon
- Hot, strongly brewed coffee (or 1 cup hot water mixed with 2 tablespoons instant espresso powder): 1 cup (240 milliliters)
For the Peppermint Cream Cheese Bind
- Unsalted Butter: one-half cup (1 stick or 113 grams), softened
- Cream Cheese: 4 ounces (113 grams), softened
- Confectioners’ Sugar: 3 cups (360 grams), sifted
- Peppermint Extract: 1 and one-half teaspoons
For the Coating and Finish
- Semi-Sweet or Dark Chocolate Chips (or finely chopped melting chocolate): 24 ounces (680 grams)
- Vegetable Shortening or Unflavored Coconut Oil: 2 tablespoons
- White Chocolate Chips or Candy Melts: 6 ounces (170 grams)
- Crushed Peppermint Candy Canes: one-half cup

Mixing, Baking, and Forming: The High-Level Steps
This recipe is divided into three major stages: creating the cake, binding the mixture, and finally, coating and decorating the formed balls. Patience and adherence to chilling times are essential for a professional finish.
- Prepare the Cake Batter: Preheat your oven to three hundred fifty Fahrenheit. Whisk together the dry cake ingredients. In a separate bowl, combine the wet ingredients (excluding the hot coffee). Blend the wet and dry mixtures, then carefully pour in the hot coffee last.
- Bake and Cool: Pour the thinned batter into a prepared 9×13 inch pan. Bake until a toothpick inserted comes out clean. Allow the cake to cool completely before proceeding—warm cake will result in a sticky, unworkable mixture.
- Prepare the Binder: While the cake cools, cream together the softened butter and cream cheese. Gradually incorporate the confectioners’ sugar and peppermint extract to create a thick, smooth frosting.
- Crumble and Combine: Once cooled, crumble the entire cake into a large bowl. Add the frosting incrementally, mixing thoroughly until the mixture is uniform and holds its shape without crumbling.
- Roll and Chill: Scoop the mixture using a small portion scoop and roll into smooth, uniform spheres. Arrange them on a parchment-lined baking sheet. Chill them thoroughly in the refrigerator for at least one hour.
- Melt and Dip: Gently melt the semi-sweet chocolate with the shortening or oil until perfectly smooth and fluid. Dip each chilled cake ball individually, ensuring full coverage, and return them to the prepared sheet.
- Decorate and Set: Drizzle the dipped balls immediately with melted white chocolate and sprinkle with crushed peppermint pieces before the coating sets. Allow them to fully harden at room temperature or in the refrigerator before serving.

Crafting the Core: Detailed Steps for Texture and Aroma
The magic of a quality cake ball lies in the balance between the rich, crumbly interior and the crisp, smooth exterior. The specific processes for creating the mocha base and the peppermint bind are crucial.
H3: Starting with the Mocha Cake Crumbles
The cake recipe is designed to be highly moist due to the inclusion of buttermilk and hot coffee, which bloom the cocoa and instant espresso (if used), intensifying the chocolate depth. When baking at three hundred fifty Fahrenheit, watch the edges—they should just begin to pull away from the pan, and the top should spring back lightly when touched. Overbaking ruins the moisture necessary for a tender cake ball texture.
Once the cake is fully cooled, the crumbling process should be tactile. Use your hands to break down the cake into fine, even crumbs. You are aiming for the consistency of coarse sand, avoiding any large chunks of cake. If crumbs are too large, the resulting cake ball will be uneven and prone to cracking when rolled or dipped. For consistency, some professional bakers pulse the cake in a food processor, but doing it by hand ensures you feel the texture change and avoid over-processing into a paste.
H3: Creating the Creamy Peppermint Bind
The secret weapon in this recipe is the use of both butter and cream cheese in the binder. The butter provides richness, while the cream cheese adds a slight tang that beautifully cuts through the sweetness of the sugar and the richness of the chocolate. When making the frosting, ensure the butter and cream cheese are truly softened—this prevents lumps and allows for a silky, homogenous mix. When incorporating the Peppermint Mocha Cake Balls binder into the crumbs, add it slowly. The goal is to bind, not saturate. The mixture is ready when you can firmly press a spoonful into your palm and it holds its shape without feeling wet or greasy. It should resemble a very dense cookie dough. If it’s too dry, the balls will crack; too wet, and they will lose their shape and be difficult to dip.
H3: Chilling for Structural Integrity
This is a non-negotiable step. After rolling the mixture into uniform balls (around 1 to 1 and one-quarter inch in diameter is ideal), they must be thoroughly chilled. The cold temperatures firm up the fat in the binder, making the spheres solid and dense. Chilling in the freezer for thirty minutes or the refrigerator for sixty to ninety minutes is necessary. Attempting to dip warm or soft balls will result in them slipping off the fork, falling apart, or melting the chocolate coating instantly, leading to a thick, messy layer.
Mastering the Coating: Dipping Techniques and Finishes
The visual appeal of these confections rests almost entirely on the quality of the chocolate shell. A smooth, thin, glossy coating elevates the look from amateur to artisan.
H3: The Right Chocolate Temperature
Using a double boiler or microwaving in short intervals (thirty seconds at a time) is key to melting chocolate. The most critical mistake is overheating, which causes the chocolate to seize or become dull and chalky when set. For the best gloss, the chocolate should not exceed ninety-two Fahrenheit. If melting chips in the microwave, remove the bowl when a few small lumps of chocolate remain, and stir continuously; the residual heat will finish the melting process beautifully.
H3: Thinning the Chocolate for a Seamless Finish
Melted chocolate chips alone are often too thick for a perfect dip, resulting in a heavy, uneven coating that can obscure the delicate shape of the cake ball. The addition of vegetable shortening or unflavored coconut oil (one tablespoon per pound of chocolate, or as directed in the recipe) helps thin the viscosity without compromising the setting ability. This results in a thinner, crisper shell that allows the interior flavor to shine without fighting through a thick layer of chocolate. Always stir the fat into the melted chocolate gently until it achieves a waterfall consistency—it should flow easily off a fork.
H3: Immediate Decorating is Key
Once you dip a ball, the coating begins to set very quickly due to the cold internal temperature of the sphere. You must apply the decoration—the drizzle and the crushed peppermint candy—immediately after dipping. Work in small batches of perhaps six to eight balls at a time. Dip, place them on the parchment, drizzle the white chocolate, and then sprinkle the candy before moving to the next batch. If the dark chocolate sets before you can drizzle, the white chocolate will not adhere properly and the crushed candy will simply roll off.
Culinary Tips for Expert Results
These specific insights will help ensure your cake balls are structurally perfect and maximally flavorful.
- Boost the Mocha: For an even more intense coffee note, replace a quarter cup of the flour in the cake base with an equal amount of instant espresso powder. This deepens the complexity of the mocha without adding bitterness.
- The Fork Method: Use a candy dipping tool or, more simply, a small, two-pronged carving fork (like a salad fork) for dipping. Stab the cake ball only slightly, immerse it fully in the chocolate, and tap the fork gently on the rim of the bowl. This allows excess chocolate to drip off, preventing a “foot” or puddle of chocolate from forming around the base.
- Preventing Cracks: The main cause of coating cracks is extreme temperature shock. After chilling, let the cake balls sit at room temperature for five to eight minutes before dipping. If the cake ball is too cold, the sudden heat of the coating will cause the shell to crack as it cools and contracts.
- The Double-Dip Technique: If your coating is very thin or the cake mixture shows through, you can execute a second, swift dip after the first layer has completely set. This creates a highly durable, opaque shell, though it adds a slightly thicker texture.
- Crushing Peppermint: Place the candy canes in a secure zip-top bag and use a rolling pin to crush them. Aim for a mix of fine dust and small, glittering shards. Avoid the food processor, which can turn the candy sticky or too fine, resulting in a less textural finish.
- Clean Drizzling: For the white chocolate drizzle, place the melted chocolate into a small piping bag (or a sturdy zip-top bag with the corner snipped tiny). Holding your hand high above the dipped balls creates a thin, elegant, thread-like stream, ensuring control and a professional aesthetic.

Customizing the Holiday Treat: Flavor Variations and Substitutions
While the classic pairing is unmatched, these cake balls offer a wonderful canvas for seasonal creativity.
- Non-Peppermint Cake Balls: If you prefer the mocha essence without the mint, simply substitute the peppermint extract in the binder with an equal amount of pure vanilla extract or even a splash of high-quality coffee liqueur. Garnish with a chocolate curl or finely chopped toffee pieces instead of candy cane.
- Gluten-Free Flour Swap: The density of the cake ball base is forgiving. You can successfully substitute the all-purpose flour with a high-quality gluten-free one-to-one baking blend. The resulting cake will still crumble well, providing the necessary texture for the bind.
- Cream Cheese Alternatives: If cream cheese is not available, you can use a high-quality vanilla or chocolate buttercream, or a cream cheese frosting made with mascarpone cheese. If using a straight buttercream, consider adding a quarter teaspoon of lemon zest or a pinch of salt to balance the richness.
- Vegan Adjustments: To make this recipe suitable for a vegan diet, use a vegan chocolate cake recipe or mix, substitute the eggs with flax eggs, use a plant-based oil, and utilize a vegan butter and cream cheese substitute for the binder. Ensure your dipping chocolate is certified dairy-free.
- Milk Chocolate Coating: For a sweeter, creamier exterior, swap the semi-sweet chocolate for high-quality milk chocolate chips. Keep the shortening or oil ratio the same to maintain the necessary fluidity for a smooth dip.
Serving with Style: Presentation Ideas for Entertaining
The finished cake balls are a dessert, a confection, and a piece of décor all in one. How you present them can enhance the entire dining experience.
- Elevated Display: Arrange the cake balls on a tiered serving tray or a decorative platter lined with cocoa-dusted parchment paper. The variation in height adds visual interest. Place them alongside a bowl of whole, uncrushed peppermint candies to reinforce the flavor cue.
- Beverage Pairings: Serve them immediately following a rich dinner alongside tiny demitasse cups of espresso or a glass of chilled, creamy Irish liqueur. The bitterness of the coffee and the warmth of the liqueur complement the cool peppermint finish perfectly.
- Gift Boxes: They hold up remarkably well at room temperature (for a few hours) and travel easily. Place four to six balls into small, rigid candy boxes or wrap them individually in clear cellophane and tie with a festive ribbon for a beautiful hostess gift.
- A Cake Pop Variation: Insert a lollipop stick halfway into the rolled cake balls before the chilling step. This transforms them into elegant cake pops, making them easier to handle, dip, and display upright in a decorative vase or piece of styrofoam covered in glittery paper.
Troubleshooting and Common Inquiries
Q: Why is my cake ball mixture too sticky to roll?
A: If the mixture feels excessively sticky, you have likely added too much of the frosting binder. To correct this, gently fold in a few tablespoons of extra confectioners’ sugar or finely ground vanilla wafer crumbs. These additions will absorb the excess moisture and firm up the mixture, allowing for smooth rolling.
Q: Can I use a boxed cake mix instead of baking from scratch?
A: Absolutely. While a scratch recipe provides superior flavor complexity, a standard chocolate boxed cake mix works perfectly well for the texture. Follow the box instructions, but substitute the water called for with the same amount of strong, cooled brewed coffee to ensure you retain the essential mocha flavor notes.
Q: How long will these confections last, and how should I store them?
A: Due to the cream cheese binder, these should ideally be stored in an airtight container in the refrigerator. They will maintain excellent freshness and quality for up to one week. If you plan to make them further in advance, you can freeze the finished, dipped cake balls for up to one month, thawing them overnight in the refrigerator before serving.
Q: My chocolate coating is too thick and won’t drip off smoothly. What happened?
A: The chocolate either seized (was overheated or got a drop of water in it) or simply requires more thinning. Try adding another teaspoon of vegetable shortening or coconut oil, stirring until smooth. If the chocolate has seized into a grainy paste, you may need to start with a fresh batch of chocolate.
Q: Why did the peppermint candy topping dissolve or weep?
A: This happens if the candy is sprinkled on while the chocolate coating is too warm or if the finished balls are stored in a high-humidity environment. The sugar in the peppermint reacts with moisture. Ensure your dipping chocolate is cooled slightly before decorating, and store the finished confections in a cool, dry place.
Nutritional Snapshot
| Nutrient | Amount per Serving |
| Calories | 245 kcal |
| Protein | 3 g |
| Carbs | 32 g |
| Fat | 13 g |
| Fiber | 1 g |
| Sugar | 27 g |
| Sodium | 105 mg |
Important Disclosure
Nutrition information is an estimate and may vary based on preparation and ingredients used.
PrintPeppermint Mocha Cake Balls: A Decadent Holiday Bite

An expert guide to making rich, festive Peppermint Mocha Cake Balls featuring a scratch-made mocha cake base, a creamy peppermint cream cheese bind, and a polished chocolate coating. They are perfect for holiday entertaining.
- Prep Time: 45 mins
- Cook Time: 30 mins
- Total Time: 2 hours 15 mins
- Yield: 48 balls 1x
- Category: Dessert
- Method: Baking, No-Bake/Confection
- Cuisine: American
Ingredients
2 cups all-purpose flour
2 cups granulated sugar
3/4 cup unsweetened cocoa powder
1 teaspoon baking soda
1 teaspoon salt
2 large eggs, at room temperature
1 cup buttermilk
1/2 cup vegetable oil
1 teaspoon vanilla extract
1 cup hot, strongly brewed coffee
1/2 cup unsalted butter (1 stick), softened
4 ounces cream cheese, softened
3 cups confectioners’ sugar, sifted
1 1/2 teaspoons peppermint extract
24 ounces semi-sweet chocolate chips
2 tablespoons vegetable shortening or unflavored coconut oil
6 ounces white chocolate chips or candy melts
1/2 cup crushed peppermint candy canes
Instructions
1. Prepare the cake batter and bake at three hundred fifty Fahrenheit until done (25–30 minutes). Cool completely.
2. Prepare the peppermint cream cheese binder by creaming butter and cream cheese, then blending with confectioners’ sugar and extract.
3. Crumble the cooled cake finely and gradually combine with the binder until a dense, uniform mixture forms.
4. Roll the mixture into 1 1/4 inch spheres and arrange them on a parchment-lined sheet. Chill for at least sixty minutes.
5. Gently melt the semi-sweet chocolate with the shortening or oil until smooth.
6. Dip each chilled cake ball using a fork, tapping gently to remove excess chocolate. Return to the sheet.
7. Immediately melt the white chocolate for drizzling. Drizzle over the dipped balls and quickly sprinkle with crushed peppermint candy canes before the coating sets.
8. Allow the cake balls to fully harden before serving or storing.
Notes
Ensure the cake is fully cooled before crumbling to prevent a sticky mixture.
Always use quality peppermint extract for the best flavor balance.
For a thinner coating, add the shortening/oil to the melted chocolate.
Store these cake balls in an airtight container in the refrigerator for up to one week.
Nutrition
- Serving Size: 2 balls
- Calories: 245
- Sugar: 27g
- Sodium: 105mg
- Fat: 13g
- Saturated Fat: 8g
- Unsaturated Fat: 4g
- Trans Fat: 0g
- Carbohydrates: 32g
- Fiber: 1g
- Protein: 3g
- Cholesterol: 35mg


