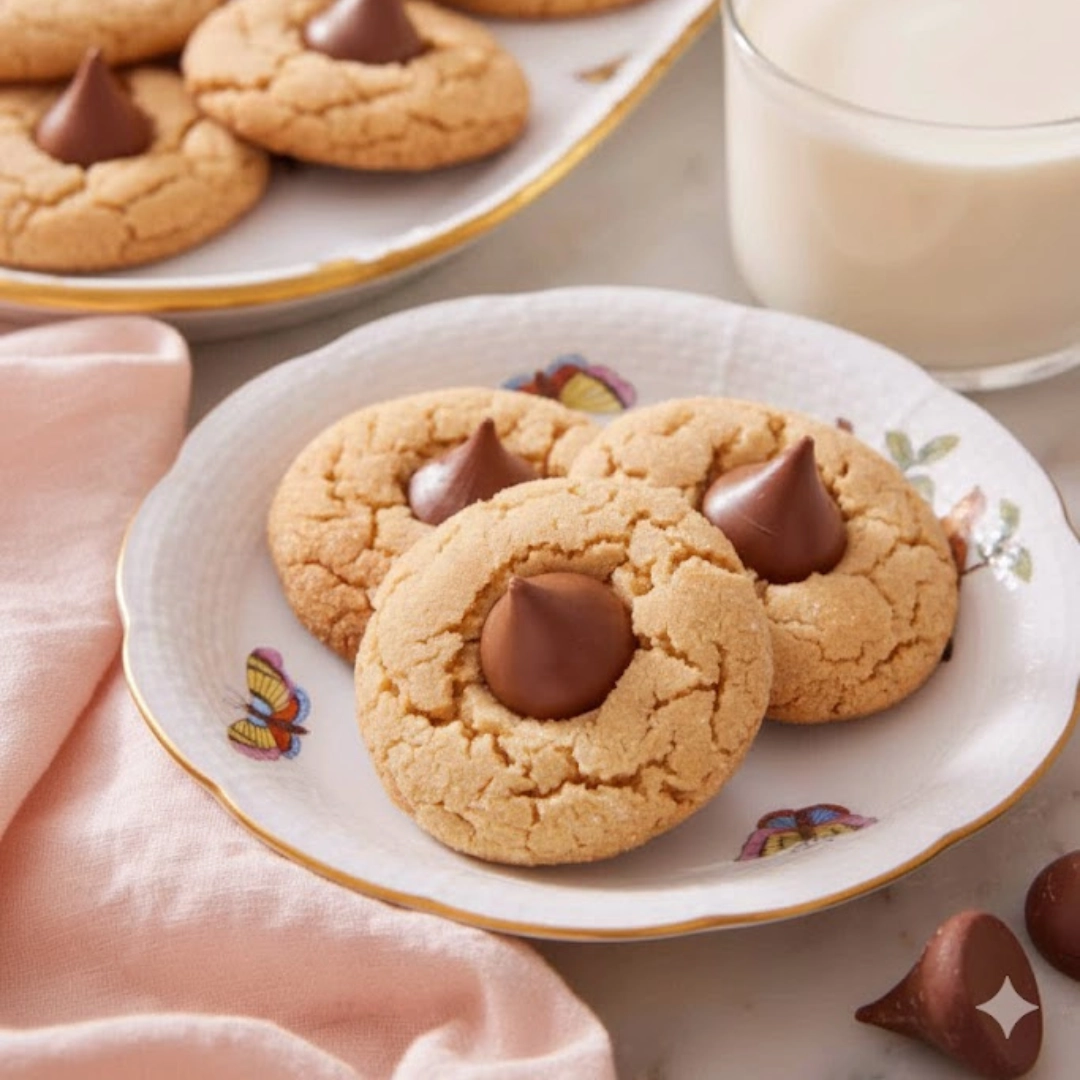
The intersection of salty, tender peanut butter and creamy, melting chocolate is a classic for a reason. These cookies, traditionally known as Peanut Butter Blossoms, represent the very best of simple baking—a chewy, soft base crowned with a decadent chocolate peak. They are a staple of bake sales, cookie exchanges, and afternoon treat plates, delivering robust flavor without requiring fussy techniques. While their visual appeal is undeniable, it is the deeply comforting texture and perfect balance of flavors that earns them a permanent spot in any baker’s repertoire, making them ideal for an easy weekend project or a celebratory gathering.
Crafting the Perfect Peanut Butter Dough
Success in this recipe hinges on using the right type of peanut butter—the stabilized, creamy variety found in the center aisles of the grocery store, not the natural, oil-separating kind. The stabilizers are essential for preventing the cookie from crumbling or spreading excessively while baking.
Wet Ingredients Base
- Three-quarters cup (one hundred eighty-eight grams) of creamy, no-stir peanut butter
- One-half cup (one hundred thirteen grams) of unsalted butter, softened
- One-half cup (one hundred grams) of granulated white sugar, plus half a cup more for rolling
- One-half cup (one hundred ten grams) of packed light brown sugar
- One large egg, brought to room temperature
- One teaspoon of vanilla extract
- One-quarter teaspoon of fine sea salt
Dry Mix and Finishing Touches
- One and one-half cups (one hundred eighty grams) of all-purpose flour
- One-half teaspoon of baking soda
- Thirty-six unwrapped chocolate kisses (or similar small, domed chocolate pieces)

The Essentials: Mixing, Shaping, and Baking Steps
This high-level roadmap outlines the process. Refer to the next section for critical details regarding dough consistency and timing, which are vital for that characteristic chewy result.
- Prepare the Kitchen: Preheat your oven to three hundred seventy-five Fahrenheit. Line baking sheets with parchment paper or silicone mats. Unwrap all the chocolate kisses now—this is a task you absolutely do not want to rush after the cookies come out of the oven.
- Cream the Fats and Sugars: In a stand mixer, beat together the peanut butter, softened butter, both sugars, and salt until the mixture is visibly lightened and fluffy.
- Incorporate Liquids: Add the room temperature egg and vanilla extract. Mix until they are fully incorporated, making sure to stop and scrape down the sides of the bowl to ensure a homogeneous mix.
- Add Dry Ingredients: Gently mix in the flour and baking soda on low speed. Stop the mixer immediately once the flour streaks disappear to avoid overmixing.
- Scoop and Coat: Roll the dough into uniform, one-inch balls. Place the extra half cup of granulated sugar in a shallow bowl and roll each dough ball through the sugar until fully coated.
- Bake: Arrange the sugared dough balls two inches apart on the prepared baking sheets. Bake for eight to ten minutes.
- Kiss the Cookies: Immediately upon removing the cookies from the oven, gently press one chocolate kiss into the center of each hot cookie.
- Cool and Set: Allow the cookies to cool completely on the baking sheet before transferring them to a wire rack or serving platter.

Achieving the Signature Texture: A Detailed Guide
Baking these cookies is less about complicated technique and more about precise observation. The key is to produce a cookie that is soft enough to yield to the chocolate kiss without falling apart, resulting in that iconic crinkled edge and moist center.
The Art of Creaming (Steps 2 and 3 Expansion)
The creaming stage is the foundation of the cookie’s texture. When you combine the butter, peanut butter, and sugars, you are whipping air into the fats. This trapped air will expand in the oven, giving the cookies their signature puffiness and keeping them tender. You should beat this mixture for a full two to three minutes on medium speed. The final result should be pale gold in color and markedly fluffy, not dense or grainy.
It is absolutely crucial that your butter is truly softened, not melted. If it is too cold, it won’t cream properly; if it’s melted, the structure will be ruined. When adding the room temperature egg, mix only until the yolk is broken and fully dispersed. Overmixing once the egg is in can activate too much gluten and result in a tougher cookie.
The Gentle Touch of Dry Ingredients (Step 4 Expansion)
This step demands patience. The goal is to bind the dough without developing excessive gluten. Switch your mixer speed to its lowest setting and add the flour and baking soda mixture all at once. Mix only until the flour is just incorporated—you should see a transition from dry powder to a cohesive, slightly sticky, yet malleable dough. A few visible streaks of flour are acceptable, as they will disappear during the final few revolutions. Stop before the dough becomes stiff. When done correctly, the final dough for these Peanut Butter Blossoms should be soft enough to easily form a ball but firm enough that it does not stick heavily to your hands.
The Role of Temperature and Uniformity (Step 5 and 6 Expansion)
The dough balls must be uniform in size to ensure they bake evenly. Using a one-inch cookie scoop (roughly eighteen grams of dough) is the best way to achieve this consistency. If you use varying sizes, some cookies will be chewy and perfect, while others will be under-baked or dry and over-baked.
The pre-rolling in granulated sugar is optional but highly recommended. It serves two purposes: first, it provides a slight crust and an appealing sparkle; second, the sharp sugar crystals help facilitate the desired “crackle” effect on the cookie’s surface as it bakes and the chocolate is pressed in. Place the dough balls on the prepared baking sheet with adequate space. If they are too close, their edges will fuse together, inhibiting the proper spread and resulting in misshapen, dense cookies.
The oven temperature of three hundred seventy-five Fahrenheit is slightly higher than for many cookies, which encourages a quick rise and spread, resulting in those attractive cracks.
Observing Doneness (Step 6 and 7 Expansion)
Doneness is indicated by visual cues, not a timer alone. After eight minutes, check the cookies. You are looking for a slightly puffy center, edges that have just begun to turn a light, faint golden brown, and visible cracks across the surface. The center should still look soft and slightly pale—this is the secret to a chewy interior. If you wait until the entire cookie is deeply golden, you will end up with a dry result.
The moment the baking sheet is pulled from the oven is the critical window for placing the chocolate kisses. You must act fast, which is why unwrapping the chocolate beforehand is crucial. Gently press the point of the kiss straight down into the center of the hot cookie. The heat will soften the dough, causing the cookie to slightly fracture around the edges, creating the “blossom” effect. If the cookie is too cool, it will resist the chocolate, and the cookie will break rather than crackle.
The Final Set (Step 8 Expansion)
Do not be tempted to move the cookies immediately. The residual heat in the baking sheet continues to cook the base and solidify the structure of the cookie. Furthermore, the chocolate kiss needs to set properly. Moving a warm cookie risks deformation, while moving the cookie before the kiss sets means the chocolate dome could slide off. Allow the cookies to sit on the sheet for at least ten to fifteen minutes until the chocolate is firm to the touch and the cookie base holds its shape completely. Only then should they be moved to a cooling rack to finish setting.
Solving Common Cookie Challenges
Even simple recipes present opportunities for missteps. Master these techniques to ensure your cookies turn out perfectly soft and chewy every single time.
- Preventing Excessive Spreading: If your cookies spread into flat discs, the culprit is often melted butter or too much liquid fat. Ensure your butter is only softened, not runny, and use non-natural, stabilized peanut butter. If your kitchen is very warm, try chilling the dough balls for fifteen minutes after rolling and before sugaring.
- Using Exact Flour Measurements: The most frequent cause of dry, crumbly cookies is too much flour. If you don’t use a kitchen scale (one hundred eighty grams is the target), use the ‘spoon and level’ method: spoon the flour into your measuring cup rather than scooping it directly from the bag, which compresses the flour. Level the excess off with the back of a knife.
- Ensuring the Chocolate Stays Firm: Some bakers worry about the chocolate melting into a puddle. If this is a concern, place your unwrapped chocolate kisses in the freezer for ten minutes before using them. This buys you a little extra time when pressing them into the hot dough.
- Achieving Consistent Size: Invest in a small cookie scoop. Consistency in size guarantees consistency in bake time. If one cookie is half the size of another, you will inevitably end up with some burnt edges.
- Don’t Overwork the Dough: Once the flour hits the wet ingredients, mix only long enough to bring everything together. Overmixing develops gluten, which translates to a tough, dry, bread-like texture instead of the desired tender chew.
- The Importance of Salt Balance: While the recipe includes salt, the characteristic flavor of a peanut butter cookie relies on that salty/sweet contrast. If you are using salted butter, reduce the recipe’s added salt by half to avoid an overly saline flavor.
- Baking Sheet Materials: Dark baking sheets absorb heat faster than light ones, increasing the risk of over-browning the bottoms. Use light-colored aluminum baking sheets for the most consistent, even result.
Flavor & Texture Modifications
These classic cookies are wonderful as written, but they lend themselves well to creative variations based on your preferred flavor profile or what you have on hand.
- Dark Chocolate Base: For a richer, deeper flavor, substitute the one-half cup of granulated white sugar for dark brown sugar. This increases moisture and molasses notes, giving the cookie a slightly darker color and a more robust chew.
- A Bit of Crunch: If you prefer a textural contrast, substitute one-third of the creamy peanut butter with crunchy peanut butter. This will introduce small pieces of roasted peanuts throughout the dough, without compromising the overall structure too much.
- The Spice Factor: Enhance the warmth by adding one-half teaspoon of ground cinnamon or a quarter teaspoon of nutmeg along with the dry ingredients. This complements the deep, earthy flavor of the peanut butter, especially during cooler seasons.
- Alternate Toppings: While the chocolate kiss is iconic, you can swap it for other small domed chocolates, small peanut butter cups, or even a candied pecan half, which provides a lovely, non-melting crunch.
- Gluten-Free Flour: This recipe works beautifully with a one-to-one gluten-free flour blend, provided it contains xanthan gum. Measure by weight (one hundred eighty grams) for the best results, as volume measurements are highly inconsistent with these alternative flours.

Serving Ideas for Any Occasion
The satisfying richness of a peanut butter cookie demands a simple counterpoint. Here are a few ways to plate and serve them for maximum enjoyment.
- Classic Dipping: Serve alongside a tall glass of cold whole milk. The temperature and the fat content of the milk cut through the richness of the cookie and chocolate, making them a perfect after-school snack or late-evening treat.
- Ice Cream Sandwich: For a simple dessert upgrade, take two completely cooled cookies and sandwich a small scoop of high-quality vanilla ice cream or salted caramel ice cream between them. Serve immediately.
- Dessert Board Staple: If you are assembling a larger platter, arrange these cookies with other contrasting textures, such as crisp shortbread, light meringue cookies, and something tangy like lemon bars. Their distinctive look makes them a great centerpiece.
- Coffee Pairing: The complex flavor profile works well with a strong, unsweetened brewed coffee or espresso. The slightly bitter notes of the coffee balance the sweetness of the sugar crust and the chocolate.
Ingredient Swaps and Frequently Asked Questions
This section addresses specific queries regarding ingredient sourcing and preparation methods, expanding on common baking inquiries.
Can I use all brown sugar instead of a mix?
Using all brown sugar will result in a moister, chewier, and slightly flatter cookie due to the increased molasses content. This is perfectly acceptable if you prefer a less dome-shaped, softer cookie. Conversely, using only granulated sugar will create a crispier, crunchier edge.
Is it necessary to roll the dough in sugar before baking?
While not strictly necessary for the recipe to work, rolling the dough in sugar adds a textural dimension and an appealing, sparkling finish that is traditional for this type of cookie. It also aids in the formation of the distinctive cracks when the chocolate is pressed in.
What if I don’t have baking soda?
Baking soda reacts with the acidic brown sugar and molasses in the recipe, acting as a leavener and encouraging the spread. You can substitute it with baking powder, but you will need to use three times the amount (one and a half teaspoons) to achieve a similar result.
How long can I keep the dough in the refrigerator?
The dough can be stored tightly wrapped in plastic in the refrigerator for up to three days. When ready to bake, let it sit on the counter for about twenty minutes to slightly soften before rolling it into balls. This prevents the chilled dough from fracturing as you shape it.
Do I have to use Hershey’s Kisses?
No, any small, domed chocolate piece will work. Miniature peanut butter cups, unwrapped milk chocolate drops, or even a small square of high-quality baking chocolate are great alternatives. The key is finding a piece that is small enough to press into the cookie without causing it to collapse entirely.
Nutritional Snapshot
| Nutrient | Amount per Serving |
| Calories | 121 kcal |
| Protein | 2 g |
| Carbs | 14 g |
| Fat | 7 g |
| Fiber | 1 g |
| Sugar | 9 g |
| Sodium | 62 mg |
Nutrition information is an estimate and may vary based on preparation and ingredients used.
PrintThe Ultimate Peanut Butter Blossoms: A Timeless Chocolate Kiss Cookie

A classic recipe for soft and chewy peanut butter cookies topped with a melted chocolate kiss. This detailed guide ensures perfect texture and flavor every time you bake Peanut Butter Blossoms.
- Prep Time: 20 mins
- Cook Time: 10 mins
- Total Time: 30 mins
- Yield: 36 cookies 1x
- Category: Dessert
- Method: Baking
- Cuisine: American
Ingredients
¾ cup creamy peanut butter
½ cup unsalted butter, softened
½ cup granulated white sugar, plus ½ cup more for rolling
½ cup packed light brown sugar
¼ teaspoon fine sea salt
1 large egg, room temperature
1 teaspoon vanilla extract
1½ cups all-purpose flour
½ teaspoon baking soda
36 unwrapped chocolate kisses
Instructions
1. Preheat the oven to three hundred seventy-five Fahrenheit. Line baking sheets with parchment paper or silicone mats. Unwrap all chocolate kisses.
2. In a stand mixer, beat together the peanut butter, softened butter, both sugars, and salt on medium speed for two to three minutes until the mixture is pale gold and fluffy.
3. Add the room temperature egg and vanilla extract. Beat until fully incorporated, stopping to scrape down the sides of the bowl once or twice.
4. Gently mix in the flour and baking soda on the lowest speed. Stop mixing immediately once the flour streaks disappear.
5. Roll the dough into uniform, one-inch balls. Roll each dough ball through the extra granulated sugar until fully coated.
6. Arrange the sugared dough balls two inches apart on the prepared baking sheets. Bake for eight to ten minutes.
7. Immediately upon removing the hot cookies from the oven, gently press one chocolate kiss into the center of each cookie.
8. Allow the cookies to cool completely on the baking sheet for ten to fifteen minutes until the chocolate is firm before transferring.
Nutrition
- Serving Size: 1 cookie
- Calories: 121
- Sugar: 9g
- Sodium: 62mg
- Fat: 7g
- Saturated Fat: 3g
- Carbohydrates: 14g
- Fiber: 1g
- Protein: 2g


