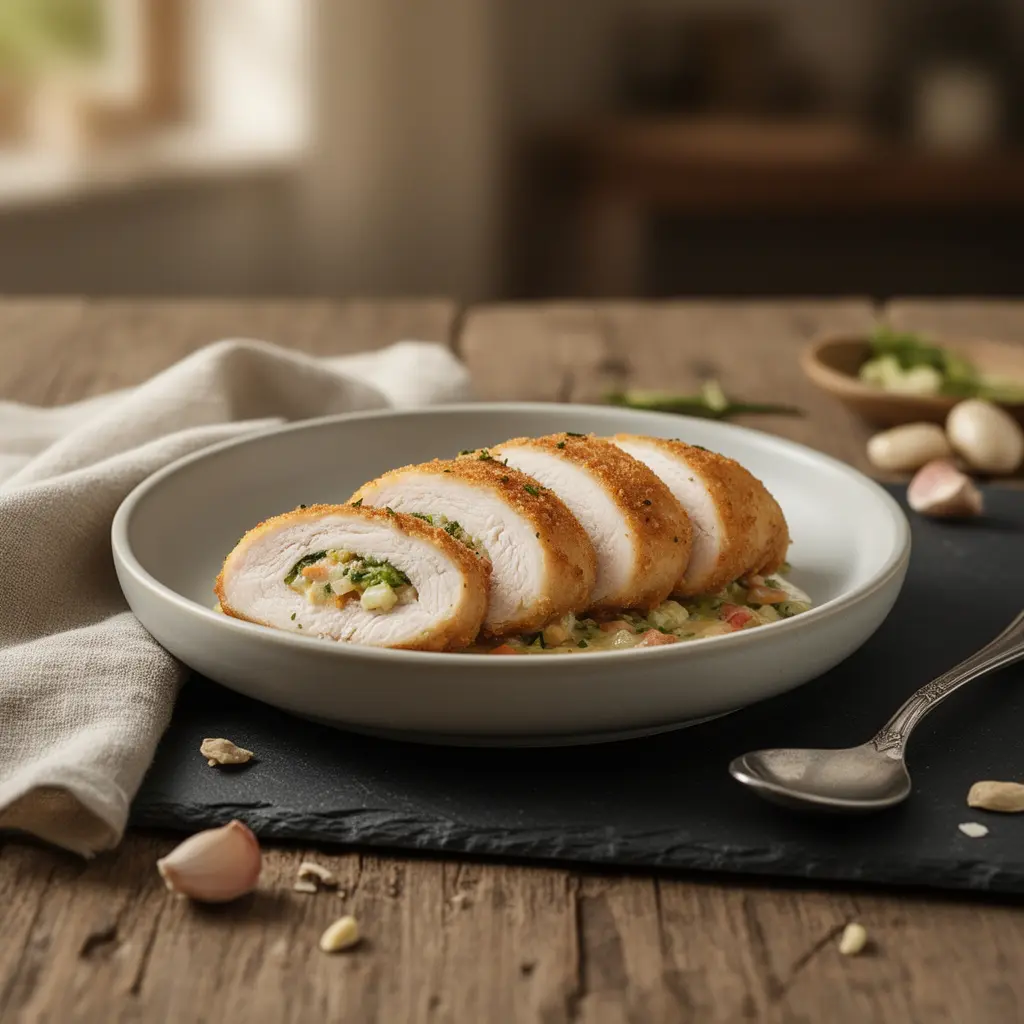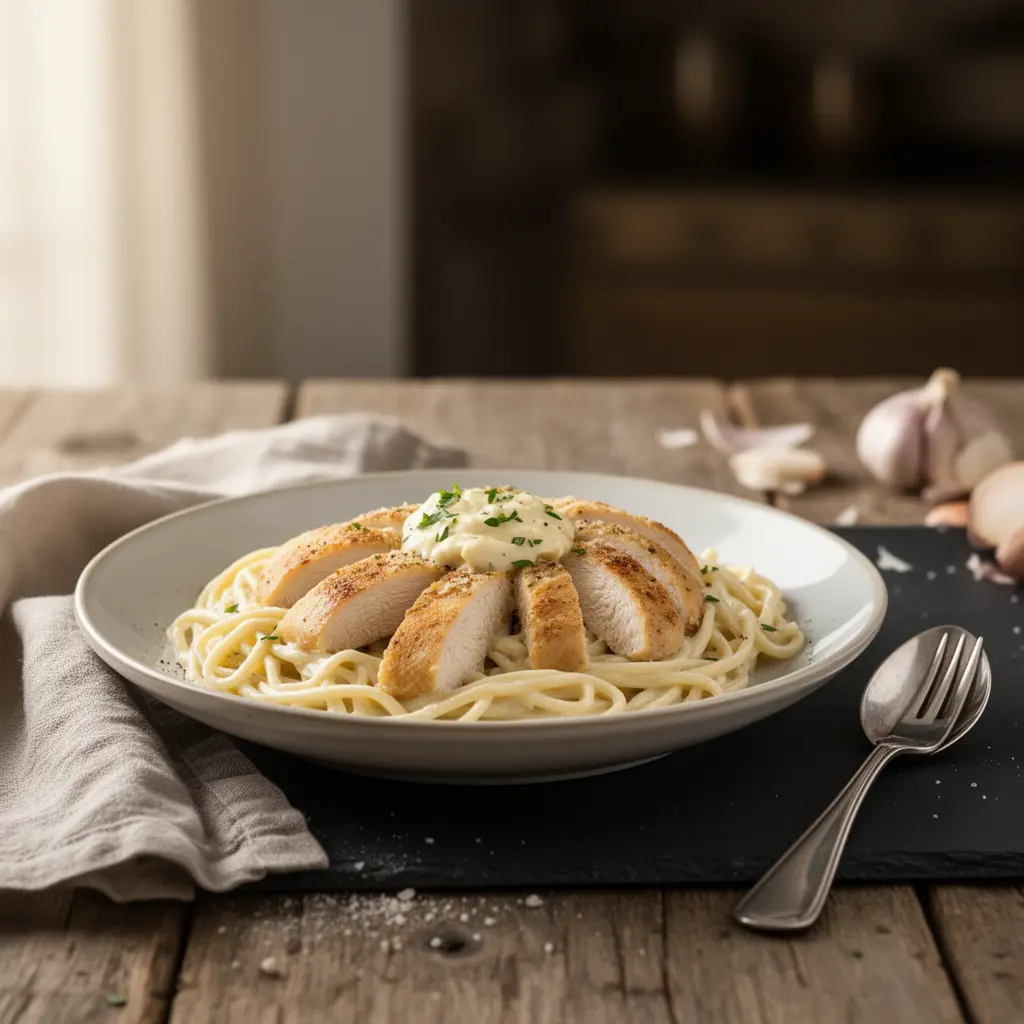
Japanese Katsu Bowls with Tonkatsu Sauce are a satisfying combination of crispy breaded cutlets, fluffy rice, and a bold, tangy-sweet sauce that ties everything together. This recipe focuses on achieving perfectly golden, crunchy katsu through proper breading, precise oil temperature, and simple, reliable techniques that work every time. Served over warm rice with fresh toppings, these bowls deliver a balanced mix of texture and flavor—crispy, savory, and incredibly comforting. Whether you’re preparing a quick weeknight dinner or a restaurant-style meal at home, this guide provides clear steps to ensure consistently light, crunchy katsu and a smooth, flavorful tonkatsu sauce.
Table of Contents
From Tradition to Your Table: What is Katsu?
Katsu is a beloved Japanese dish, short for katsuretsu (cutlet), which refers to meat that has been seasoned, dredged in flour and egg, coated in panko breadcrumbs, and deep-fried until golden brown.
Chicken Katsu: The Ultimate Comfort Food
While many versions exist, chicken katsu (or Tori Katsu) is popular for its tender texture and mild flavor, which serves as a perfect canvas for the savory-sweet Tonkatsu sauce. The key to excellent katsu lies in using high-quality boneless, skinless chicken breast or thighs, pounded thin for uniform cooking. This ensures every piece is cooked quickly, remaining moist on the inside while achieving maximum crispness on the outside.
The Role of Panko: Why It Matters for a Crispy Coat
Panko is not interchangeable with regular breadcrumbs. Panko is a specific Japanese breadcrumb made from bread without crusts, yielding light, flaky shards instead of dense granules.
- Less Absorption: Panko absorbs less oil than standard breadcrumbs, resulting in a cleaner, lighter-tasting fry.
- Maximum Crispness: Its airy, irregular structure creates sharp, delicate points that crisp up intensely, providing that signature satisfying crunch.
Ingredients You’ll Need for Authentic Katsu Bowls
Based on my experience adjusting flavors for different palates, the following ingredients strike the perfect balance between authentic flavor and accessibility.
Tested Ingredients for Perfect Chicken Katsu
- Chicken: 2 boneless, skinless chicken breasts (or 4 boneless, skinless thighs), pounded to about 1/2-inch thickness.
- Seasoning: Salt and freshly ground black pepper.
- Dredging: All-purpose flour, large eggs, and panko breadcrumbs.
- Frying Oil: High smoke point oil like canola, vegetable, or peanut oil.

Simple, Customizable Tonkatsu Sauce Components
The sauce is the true soul of the dish. It is a savory, tangy, and slightly sweet condiment that perfectly cuts through the richness of the fried chicken.
- Base: Ketchup
- Savory: Worcestershire sauce
- Sweetness: Granulated sugar or honey
- Acidity: Rice vinegar
- Umami Depth: Soy sauce
Step-by-Step Guide: How to Make Crispy, Flavorful Katsu
This is the precise, tested method for achieving restaurant-quality katsu at home.
Prep Work and Technique: The Three-Step Dredging
Proper preparation is crucial to ensure the breading adheres perfectly.
- Prep the Chicken: Season the pounded chicken cutlets liberally with salt and pepper.
- Set Up Stations: Arrange three shallow dishes: one with flour, one with beaten eggs, and one with panko.
- Dredging Order:
- Coat the chicken in flour, shaking off any excess. This provides a dry surface for the egg to stick to.
- Dip the floured chicken in the egg, ensuring a full coating.
- Press the chicken firmly into the panko until completely covered. Tip: Pat the panko onto the cutlet to create a thick, consistent layer.

Frying Secrets: Achieving the Golden Crunch (Oil Temperature)
After testing this recipe multiple times, I’ve found that temperature control is the most critical factor.
- Heating the Oil: Pour 1–2 inches of oil into a deep, heavy-bottomed pot or Dutch oven. Heat the oil to $325^{\circ}\text{F}$ ($160^{\circ}\text{C}$). Use a thermometer—do not guess!
- Frying: Gently place the katsu cutlets into the hot oil, working in batches to avoid overcrowding, which drops the oil temperature. Fry for 3–4 minutes per side, or until the coating is deep golden brown and the chicken reaches an internal temperature of $165^{\circ}\text{F}$ ($74^{\circ}\text{C}$).
- Draining: Remove the finished katsu and immediately place it on a wire rack over a baking sheet to drain. This prevents the bottom from getting soggy.
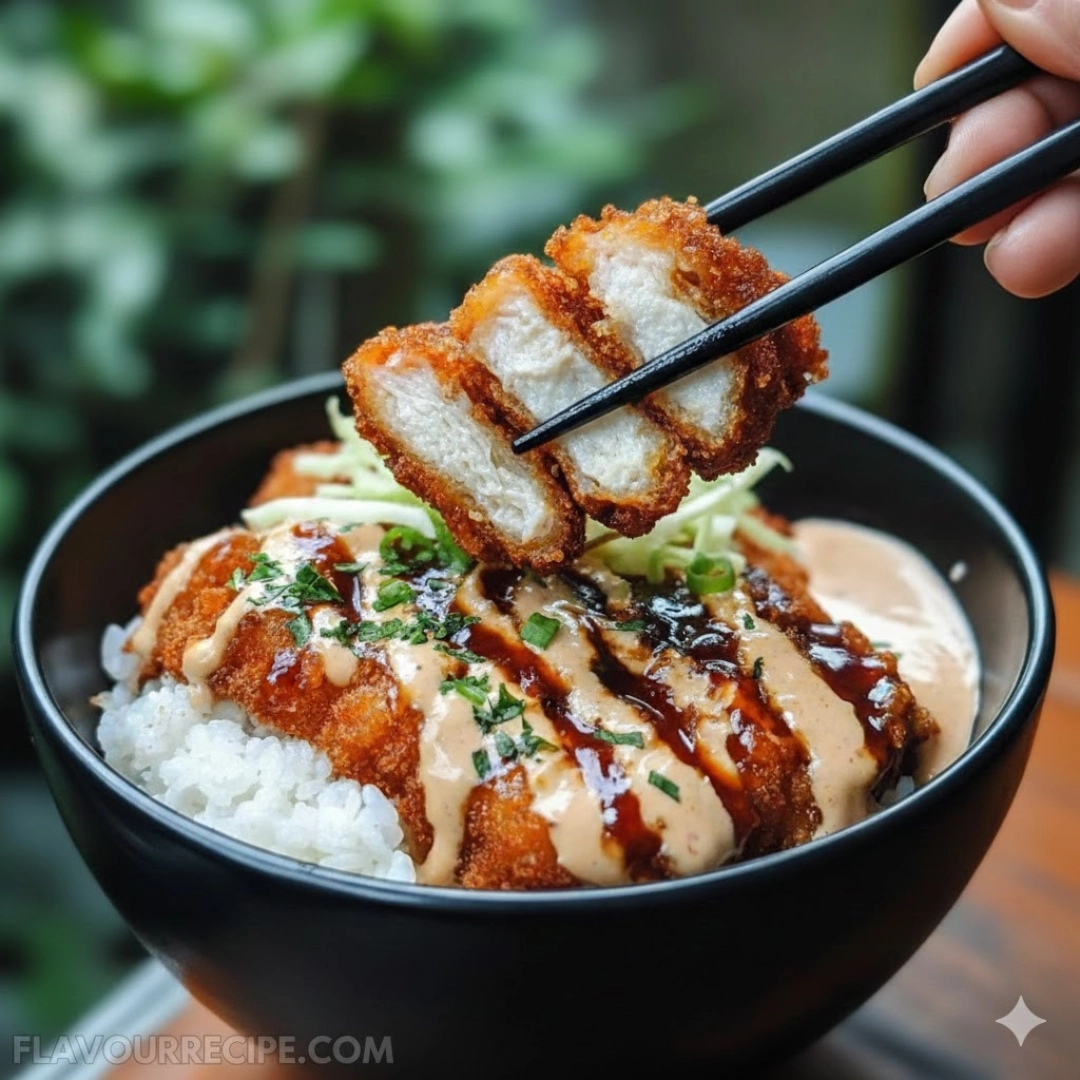
Assembling Your Bowl and Expert Serving Suggestions
A katsu bowl is traditionally built for layers of texture and flavor.
Creative Toppings and Pairings
Beyond the traditional shredded cabbage, consider these additions to enhance your bowl:
- Aromatics: Thinly sliced green onions or toasted sesame seeds.
- Texture: A drizzle of Japanese mayonnaise (Kewpie) or a side of pickled ginger.
- Sauce Variations: For those who love bold, rich flavors, this recipe also works beautifully in our guide on making a creamy, savory sauce for mini baked chicken tacos.
Make It A Meal: Pairing with Sides
The crispy katsu and the rich sauce require a light, refreshing counterpoint.
- Steamed, fluffy Japanese short-grain rice.
- Simple shredded raw cabbage (essential for texture).
- Miso soup or a light cucumber salad. For a quick, crowd-pleasing side, you could also prepare a vibrant pasta salad, similar to our grinder pasta salad.

Chef’s Guide to Katsu Substitutions and Variations
As a culinary professional, I understand the need for adaptability in the kitchen.
Non-Chicken Options
If chicken is not preferred, the katsu preparation method translates flawlessly to other protein sources:
- Fish Katsu: Use firm white fish like cod or tilapia. Cook time will be shorter.
- Tofu Katsu: Press firm or extra-firm tofu exceptionally well before seasoning and breading.
- Vegetable Katsu: Large, thick slices of eggplant or zucchini make an excellent vegetarian alternative.
Gluten-Free Panko Alternatives
The crispness of panko can be achieved without gluten using:
- Gluten-Free Panko: Increasingly available in specialty stores.
- Crushed Corn Flakes: A classic, budget-friendly alternative that provides great crunch.
Storage, Reheating, and Nutritional Notes
Proper storage is crucial to preserve the crispiness of the dish.
Keeping Katsu Crispy: Best Storage Methods
- Storage: Store leftover katsu separately from the rice and sauce. Place the fried chicken in an airtight container lined with paper towels in the refrigerator for up to 3 days.
- Reheating: Never use a microwave, which turns katsu soggy. Reheat on a wire rack in a $350^{\circ}\text{F}$ ($175^{\circ}\text{C}$) oven or air fryer for 5–8 minutes until piping hot and re-crisped.
A Quick Note on Nutrition and Moderation
Chicken katsu is, by nature, a deep-fried dish.
- While it provides an excellent source of protein from the chicken, it is higher in fat and calories due to the frying process.
- Portion control, balancing the bowl with lots of fresh cabbage, and using a high-quality frying oil can help keep this dish a balanced treat.
This content is for educational purposes only and does not replace professional dietary or medical advice.
Frequently Asked Questions (FAQs) About Katsu Bowls
Can I bake the katsu instead of frying it?
Yes, you can. While deep frying yields the crispiest result, baking or air frying works well. For baking, preheat your oven to $400^{\circ}\text{F}$ ($200^{\circ}\text{C}$), spray the breaded cutlets with cooking spray, and bake for 15–20 minutes, flipping halfway, until golden brown.
What is the difference between Tonkatsu and Katsu Sauce?
Tonkatsu is the name of the sauce itself, and it is the sauce traditionally paired with katsu (the cutlet). They are essentially one and the same in this context. It’s a thick, savory Japanese condiment distinct from Worcestershire sauce, though Worcestershire sauce is often an ingredient in homemade versions.
Why does the breading sometimes fall off during frying?
The main reasons the breading falls off are: not properly coating the chicken in flour first (the “glue” layer), or moving the chicken too soon in the hot oil. Ensure the dredging steps are followed precisely and let the katsu develop a crust for a minute or two before turning it.
Can I make the Tonkatsu sauce ahead of time?
Absolutely. The Tonkatsu sauce can be mixed and stored in an airtight container in the refrigerator for up to two weeks. The flavor actually deepens slightly overnight, making it a great prep-ahead option.
The Best Homemade Japanese Katsu Bowls with Tonkatsu Sauce
The definitive homemade recipe for crispy Chicken Katsu served in a bowl with fluffy rice and a savory, tangy Tonkatsu sauce.
- Prep Time: 15 mins
- Cook Time: 15 mins
- Total Time: 30 mins
- Yield: 4 servings 1x
- Category: Main Dish
- Method: Deep Fried
- Cuisine: Japanese
Ingredients
2 boneless, skinless chicken breasts (or 4 thighs), pounded thin
Salt and black pepper to taste
1/2 cup all-purpose flour
2 large eggs, beaten
1 cup panko breadcrumbs
2 cups high smoke point oil (for frying)
4 cups cooked Japanese short-grain rice, for serving
1 cup shredded cabbage, for serving
1/2 cup ketchup (for sauce)
1/4 cup Worcestershire sauce (for sauce)
2 tablespoons granulated sugar (for sauce)
1 tablespoon rice vinegar (for sauce)
1 teaspoon soy sauce (for sauce)
Instructions
1. Season the chicken cutlets with salt and pepper. Set up three shallow dishes: one with flour, one with beaten eggs, and one with panko.
2. Dredge each piece of chicken first in the flour, then in the egg, and finally press firmly into the panko until fully coated.
3. Whisk together the ketchup, Worcestershire sauce, sugar, rice vinegar, and soy sauce in a small bowl until the sugar dissolves. Set aside.
4. Heat oil in a deep pot to 325°F (160°C). Fry the breaded chicken in batches for 3–4 minutes per side, until golden brown and cooked through (internal temp 165°F/74°C). Drain immediately on a wire rack.
5. Slice the katsu into strips. Divide the cooked rice among four bowls, top with shredded cabbage, and place the sliced katsu on top. Drizzle generously with the prepared Tonkatsu sauce.
Notes
The katsu should be fried in batches to maintain oil temperature.
Always drain katsu on a wire rack, not paper towels, to keep it crispy.
For variations, try using firm white fish or pressed tofu instead of chicken.
Nutrition
- Serving Size: 1 bowl
- Calories: 550
- Sugar: 8g
- Sodium: 400mg
- Fat: 15g
- Saturated Fat: 4g
- Unsaturated Fat: 8g
- Trans Fat: 0g
- Carbohydrates: 65g
- Fiber: 3g
- Protein: 45g
- Cholesterol: 120mg