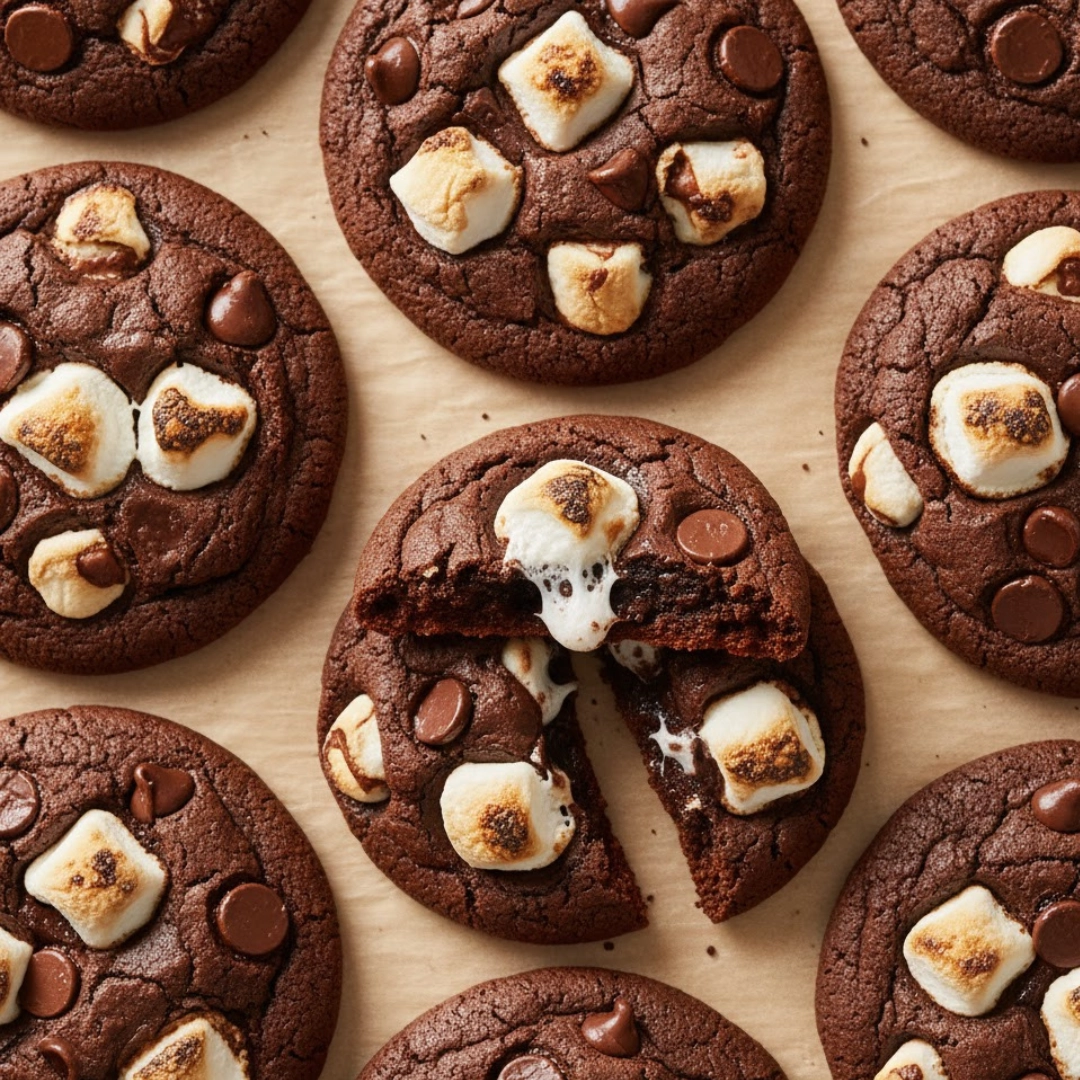
There is a particular kind of quiet satisfaction that comes from transforming a deeply beloved beverage into a portable, chewy treat. That is precisely what these Hot Chocolate Cookies deliver. They capture the essence of a steaming mug of cocoa—rich chocolate depth, subtle vanilla warmth, and, crucially, a cloud of melted marshmallow—in a substantial, bakery-style cookie. This is not a thin, brittle wafer, but a thick, fudgy disk built for chilly afternoons and demanding dessert cravings. They are ideal for holiday cookie exchanges, school bake sales, or simply as an indulgent anchor to your evening coffee ritual.
The success of this recipe lies in layering flavors and textures. We use a blend of melted butter and oil for chewiness, cocoa powder for deep color, and the secret ingredient: actual packets of powdered hot chocolate mix to amplify the characteristic, slightly milky cocoa profile. It’s a simple adjustment that makes all the difference, creating a truly recognizable taste that will make everyone ask for the recipe.
Table of Contents
What You’ll Need in the Pantry
These measurements will yield approximately two dozen substantial cookies.
- Dry Mix & Chocolate Base
- 2 cups (240 grams) all-purpose flour
- 1/2 cup (43 grams) unsweetened cocoa powder, preferably Dutch process
- 1/2 cup (50 grams) quality instant hot chocolate mix powder (two standard packets)
- 1 teaspoon baking soda
- 1/2 teaspoon fine sea salt
- 1 cup (180 grams) semi-sweet chocolate chips, plus extra for topping
- Fats & Sweeteners
- 1/2 cup (1 stick or 113 grams) unsalted butter, melted and slightly cooled
- 1/4 cup (60 milliliters) vegetable oil, or other neutral cooking oil
- 3/4 cup (150 grams) granulated sugar
- 1/2 cup (110 grams) packed light brown sugar
- Wet Ingredients & Toppings
- 2 large eggs, at room temperature
- 1 tablespoon pure vanilla extract
- 1 1/2 cups (110 grams) miniature marshmallows

The Baker’s Path: A Quick Guide
- Prep the Oven and Pan: Preheat your oven to three hundred fifty Fahrenheit. Line two baking sheets with parchment paper.
- Combine the Dry Elements: Whisk together the flour, cocoa powder, hot chocolate mix, baking soda, and salt in a medium bowl until fully homogeneous.
- Cream the Sugars and Fats: In a separate large bowl, whisk together the cooled melted butter, oil, and both sugars until well combined and smooth.
- Incorporate the Wet Ingredients: Whisk in the eggs one at a time, followed by the vanilla extract, ensuring each is fully blended before adding the next.
- Form the Dough: Gradually add the dry mixture to the wet mixture, mixing on low speed or by hand until just combined. Fold in the one cup of chocolate chips.
- Portion and Chill (Recommended): Scoop 2-tablespoon portions of dough onto the prepared sheets. Cover the sheets and chill the dough for a minimum of thirty minutes.
- Bake the Bases: Bake the chilled dough for nine to eleven minutes until the edges are just set but the centers still look slightly soft.
- Marshmallow Finish: Remove the pans, quickly press six to eight mini marshmallows into the top of each cookie, and return to the oven for two to three minutes until the marshmallows are puffed and lightly golden.
- Cool and Serve: Let the cookies cool on the baking sheet for five minutes to allow them to set before transferring them to a wire rack to cool completely.

Mastering the Process: Sensory Cues and Key Details
The magic of these cookies happens in the small steps, particularly when integrating the chocolate elements.
On the Art of Whisking and Sifting
While many recipes skip sifting, the fine particulate nature of cocoa powder and the instant hot chocolate mix means they clump easily. Take the time to whisk the dry ingredients thoroughly—this is your chance to ensure the baking soda and salt are evenly dispersed for a consistent rise and flavor. The goal is a uniform, medium-brown powder, free of streaks or dark pockets.
Combining Fats, Sugars, and Temperature
It’s critical that the melted butter is cooled slightly before mixing. If it’s too hot, it can start to “cook” the eggs when added later, leading to a dry, less tender crumb. The mixture of melted butter and oil gives the cookies their unique chewiness and prevents them from spreading too thin. Whisking the sugars into the fats until lightened and smooth takes about one minute and helps begin the emulsification process, trapping air that contributes to a light texture.
The Gentle Fold of the Dough
When adding the dry ingredients to the wet, mix only until the flour streaks disappear—no more. Over-mixing gluten-based doughs develops elasticity, which translates to a tough, cake-like cookie. Use a rubber spatula for the final incorporation of the flour and the one cup of chocolate chips. The finished dough should be soft, slightly sticky, and uniformly dark brown.
The Role of Chilling
Do not skip the chilling step! Chilling the dough solidifies the fats, which dramatically slows the spread of the cookie when it hits the hot oven. This yields a thicker, fudgier cookie base with those coveted slightly cracked edges, rather than a flat disc. Thirty minutes is the minimum, but an hour is better.
The Marshmallow Finale
The key to the marshmallow topping is timing. Baking the cookie base first ensures the interior is set before the marshmallows are added. Press the marshmallows into the still-warm, partially-baked cookies, then return them for a very brief, high-heat flash bake. Watch carefully: they will go from soft and puffy to burned very quickly. You are looking for a gentle puff and a very light golden-brown color on the edges, indicating a warm, gooey interior. Add a few extra chocolate chips to the tops when they come out of the oven for a beautiful, melty appearance.
Expert Suggestions for Superior Cookies
The Power of Quality Cocoa
The flavor of a chocolate cookie lives or dies by its cocoa powder. Swap standard grocery store cocoa for a high-quality, dark Dutch-processed variety. Dutch processing neutralizes the acidity, yielding a smoother, richer, and darker chocolate flavor that mimics the depth found in a perfect cup of cocoa.
Room Temperature Eggs are Non-Negotiable
Eggs at room temperature incorporate much better into the creamed mixture of fats and sugars, creating a more stable emulsion. This traps more air and results in a lighter, more evenly textured final cookie. If you forget to set them out, place the eggs in a bowl of warm (not hot) water for five minutes.
The Chill is Your Friend
If you’re making these for a party, the dough freezes beautifully. Scoop the portions onto a parchment-lined sheet, freeze until solid, and then transfer the solid dough balls to an airtight container or freezer bag. They can be baked from frozen; just add two to three minutes to the total baking time.
Managing Marshmallow Stickiness
To prevent the sticky, melted marshmallow from fusing the cookies to your parchment paper, make sure you let them cool for the full five minutes on the baking sheet before attempting to move them. They will firm up slightly as they cool, making them easier to handle.
Use of a Cookie Scoop
A simple two-tablespoon cookie scoop ensures uniform sizing. Uniformity means all your cookies bake at the exact same rate, preventing some from being undercooked while others are overbaked. It’s a small tool, but essential for professional-looking results.
Adjusting the Recipe: Flavor Variations
Salted Caramel Swirl
Before folding in the chocolate chips, swirl one-quarter cup of thick, high-quality salted caramel sauce into the finished dough. Do not over-mix; you want visible ribbons of caramel throughout. This adds a sophisticated depth and salinity that contrasts nicely with the sweetness of the marshmallow.
Peppermint Bark Edition
Replace the vanilla extract with one teaspoon of peppermint extract. After the cookies are baked and cooled, melt four ounces of white chocolate with one teaspoon of neutral oil and drizzle it over the cookies. Before the chocolate sets, sprinkle crushed peppermint candies or candy canes on top.
Espresso Boost
Add one teaspoon of instant espresso powder along with the dry ingredients. This doesn’t make the cookie taste like coffee, but the dark, bitter notes of the espresso greatly enhance and deepen the flavor profile of the cocoa, creating an intensely rich chocolate experience.

The Perfect Accompaniment
These Hot Chocolate Cookies are satisfyingly rich on their own, but pairing them thoughtfully can elevate the entire experience.
- Classic Milk Dunk: Naturally, the best partner is a tall glass of cold milk, preferably whole milk. The cold, crisp liquid balances the fudgy warmth of the cookie and the sweetness of the marshmallow.
- The Adult Pairing: Serve these alongside a simple espresso or a short, strong Americano. The slight bitterness and heat of the coffee cuts through the richness, acting as a palate cleanser between bites.
- A Scoop of Vanilla: For a playful dessert, gently warm the cookies for thirty seconds, then press a scoop of premium vanilla bean ice cream between two of them for an elevated cookie sandwich.
Addressing Common Recipe Questions
Can I use full-sized marshmallows?
Yes, but you will need to cut them down. A full-sized marshmallow can overwhelm the cookie and spread too much. Cut them into quarters using kitchen shears and press three or four of these smaller pieces onto the cookie tops, rather than the six to eight mini marshmallows called for.
Why is my dough spreading too much?
The most common culprits are insufficient chilling or using a baking sheet that is too warm. Ensure the baking sheets are fully cooled between batches. Also, check your flour measurement; too little flour (or too much liquid) causes the dough to be too wet, leading to excessive spread.
What if I don’t have Dutch-process cocoa?
You can use natural cocoa powder, but you may want to slightly decrease the baking soda to three-quarters of a teaspoon. Natural cocoa is acidic and will react more strongly with the baking soda, which can cause the cookies to puff up quickly and then flatten into a less desirable shape.
How should I store the finished cookies?
Store completely cooled cookies in an airtight container at room temperature for up to five days. To maintain their soft texture, you can add half a slice of plain sandwich bread to the container; the cookies will absorb the moisture from the bread.
Nutrition Information
| Nutrient | Amount per Serving |
| Calories | 195 kcal |
| Protein | 3 g |
| Carbs | 32 g |
| Fat | 7 g |
| Fiber | 1 g |
| Sugar | 21 g |
| Sodium | 110 mg |
Disclaimer
Nutrition information is an estimate and may vary based on preparation and ingredients used.
PrintRich and Fudgy Hot Chocolate Cookies
There is a particular kind of quiet satisfaction that comes from transforming a deeply beloved beverage into a portable, chewy treat. That is precisely what these Hot Chocolate Cookies deliver. They capture the essence of a steaming mug of cocoa—rich chocolate depth, subtle vanilla warmth, and, crucially, a cloud of melted marshmallow—in a substantial, bakery-style cookie. This is not a thin, brittle wafer, but a thick, fudgy disk built for chilly afternoons and demanding dessert cravings.
- Prep Time: 20 mins
- Cook Time: 14 mins
- Total Time: 1 hour 15 mins
- Yield: 24 cookies 1x
- Category: Dessert
- Method: Baking
- Cuisine: American
Ingredients
2 cups (240 grams) all-purpose flour
1/2 cup (43 grams) unsweetened cocoa powder, preferably Dutch process
1/2 cup (50 grams) instant hot chocolate mix powder
1 teaspoon baking soda
1/2 teaspoon fine sea salt
1 cup (180 grams) semi-sweet chocolate chips, plus extra for topping
1/2 cup (1 stick or 113 grams) unsalted butter, melted and slightly cooled
1/4 cup (60 milliliters) vegetable oil
3/4 cup (150 grams) granulated sugar
1/2 cup (110 grams) packed light brown sugar
2 large eggs, at room temperature
1 tablespoon pure vanilla extract
1 1/2 cups (110 grams) miniature marshmallows
Instructions
1. Preheat your oven to three hundred fifty Fahrenheit. Line two baking sheets with parchment paper.
2. Whisk together the flour, cocoa powder, hot chocolate mix, baking soda, and salt in a medium bowl until fully homogeneous.
3. In a separate large bowl, whisk together the cooled melted butter, oil, and both sugars until well combined and smooth.
4. Whisk in the eggs one at a time, followed by the vanilla extract, ensuring each is fully blended before adding the next.
5. Gradually add the dry mixture to the wet mixture, mixing on low speed or by hand until just combined. Fold in the one cup of chocolate chips.
6. Scoop 2-tablespoon portions of dough onto the prepared sheets. Cover the sheets and chill the dough for a minimum of thirty minutes.
7. Bake the chilled dough for nine to eleven minutes until the edges are just set but the centers still look slightly soft.
8. Remove the pans, quickly press six to eight mini marshmallows into the top of each cookie, and return to the oven for two to three minutes until the marshmallows are puffed and lightly golden.
9. Let the cookies cool on the baking sheet for five minutes to allow them to set before transferring them to a wire rack to cool completely.
Notes
For the best, deepest chocolate flavor, use a high-quality, dark Dutch-processed cocoa powder.
Do not skip the chilling step; this solidifies the fats, which is essential for a thick, fudgy cookie.
Store completely cooled cookies in an airtight container at room temperature for up to five days. You can add half a slice of bread to keep them soft.
Nutrition
- Serving Size: 1 cookie
- Calories: 195
- Sugar: 21g
- Sodium: 110mg
- Fat: 7g
- Saturated Fat: 4g
- Unsaturated Fat: 3g
- Trans Fat: 0g
- Carbohydrates: 32g
- Fiber: 1g
- Protein: 3g
- Cholesterol: 25mg


