
This gluten-free naan bread recipe delivers a soft, fluffy, and perfectly pliable flatbread with the classic blistered surface and tender chew found in traditional naan. Instead of relying on gluten for structure, this version uses a balanced blend of millet flour, tapioca starch, and psyllium husk to create lift, elasticity, and a satisfying texture.
The dough comes together quickly and cooks in just a few minutes on a hot skillet, making it an easy, accessible option for anyone avoiding gluten. Each naan turns out lightly charred, buttery, and ideal for pairing with curries, dipping into sauces, or serving alongside grilled meats and vegetables.
With simple ingredients and a streamlined method, this recipe offers an authentic-tasting gluten-free naan that’s ready in under 45 minutes and suitable for everyday meals or special occasions.
Table of Contents
The Role of Each Ingredient (And Why You Can’t Skip Them)
Every ingredient in this gluten-free naan bread recipe plays a specific structural role remove or alter one, and the balance changes completely. Unlike wheat-based doughs, which depend on gluten for stretch and strength, gluten-free doughs rely on smart substitutions that mimic that same elasticity.
Millet Flour: This naturally gluten-free flour provides the body and mild, nutty flavor of traditional naan. It offers structure similar to wheat proteins and helps the dough hold shape without crumbling. Millet also adds a golden hue and pleasant aroma when cooked.
Tapioca Starch: Tapioca is what gives the naan its signature chew and flexibility. It creates a slightly sticky, stretchy texture that balances the density of millet flour. When exposed to heat, tapioca gelatinizes, allowing steam to form pockets the secret behind those beautiful naan bubbles.

Psyllium Husk: This is the real workhorse of the recipe. Psyllium absorbs water and forms a gel, which acts like gluten strands would in a traditional dough. It traps air, retains moisture, and gives the naan its supple, springy texture. Without it, your dough will fall apart or bake up dry and flat.
Yoghurt: Traditional naan uses yoghurt for a reason its gentle acidity relaxes the dough and contributes to tenderness. It also adds moisture, flavor, and slight tang. For dairy-free variations, plain coconut or almond yoghurt works beautifully, though it may add a subtle flavor note.
Olive Oil: This provides richness and helps retain moisture during cooking. It also aids in creating a light crust and enhances browning. If you prefer a neutral taste, sunflower or avocado oil are good alternatives.
Baking Powder: Instead of yeast, baking powder creates lift by releasing carbon dioxide when heated. This chemical reaction ensures that each naan puffs up even without fermentation, keeping the recipe fast and foolproof.
Each of these ingredients works in harmony to replicate what gluten and yeast do in traditional breadmaking. It’s culinary chemistry and when you get the ratios right, the result is soft, chewy naan that rivals anything made with wheat.
How to Build the Perfect Dough
Creating perfect gluten-free naan bread starts long before the skillet touches the stove. The key lies in how you mix, hydrate, and handle the dough. Because gluten-free flours behave differently than wheat, small technique details make all the difference between a crumbly mess and a soft, flexible flatbread.
Mix with Precision (Use a Scale)
Accuracy is everything in gluten-free baking. Using a digital kitchen scale ensures the right balance of starch and structure. Too much flour and the dough turns dry; too much water and it becomes sticky and unmanageable. Measure each ingredient by weight, not volume, and mix thoroughly so every part of the dough is hydrated.

The Right Hydration Level
Gluten-free flours are more absorbent, and psyllium husk dramatically increases that capacity by forming a gel. After mixing your psyllium with warm water, let it rest for 30–45 seconds until it thickens. This step gives your dough elasticity and moisture retention, preventing cracking as it cooks. When you combine the wet and dry ingredients, the dough should feel supple, slightly springy, and just tacky enough to hold together.
Kneading Without Gluten
Without gluten strands to develop, kneading isn’t about stretching it’s about combining and activating hydration. Use your hands to gently squeeze the dough through your fingers, pressing and folding until it’s cohesive and smooth. You’re not looking for that glossy elasticity typical of wheat dough, but a soft, pliable mass that holds shape and springs back lightly when pressed.

If the dough feels dry or grainy, add a teaspoon of water at a time. If it’s too sticky, dust with a small amount of millet flour. A well-balanced dough will release cleanly from the sides of the bowl and won’t cling to your hands.
Once mixed, cover the dough with a clean towel and let it rest for about 10 minutes. This resting period allows the psyllium to finish hydrating and the flours to relax, ensuring your naan rolls out easily and cooks evenly.
Cooking Technique 101 Heat, Timing & Texture
Cooking gluten-free naan bread is where the transformation happens from soft dough to golden, puffed perfection. While the recipe itself is simple, the technique determines whether your naan turns out chewy and airy or dense and dry. The secret lies in mastering heat control and timing.
Preheat the Pan Properly
Use a heavy-bottomed skillet or cast iron pan for even heat distribution. Set it over medium-high heat and let it preheat for at least 3–5 minutes. To test readiness, sprinkle a few drops of water into the pan if they sizzle and evaporate instantly, it’s hot enough. A well-heated pan ensures that steam forms quickly, helping the naan puff and blister beautifully.
The Physics of Puffing
When the rolled-out dough hits the hot surface, two things happen simultaneously:
- The baking powder releases carbon dioxide.
- The moisture inside the dough turns to steam.
Together, these forces create air pockets that make the naan rise and bubble. The psyllium husk traps this steam, giving the bread its signature lift without collapsing. Flip too soon, and you’ll interrupt that process wait until bubbles appear across most of the surface before turning.
Timing and Visual Cues
Cook each naan for about 1–2 minutes on the first side until the underside develops deep golden spots and the top shows large bubbles. Then flip and cook for another minute, pressing lightly with a spatula to help even contact with the pan. The second side should char slightly while remaining tender inside. If it’s burning too quickly, lower the heat; if it looks pale or flat, increase the temperature slightly.
Finishing Touches for Flavor and Texture
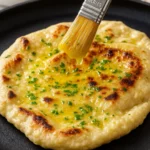
As soon as the naan comes off the pan, brush it generously with melted butter or ghee. This not only enhances flavor but also keeps the surface soft and glossy. For an aromatic touch, stir a bit of chopped parsley, cilantro, or crushed garlic into the butter before brushing. If you prefer a dairy-free version, olive oil or vegan butter works just as well.
Once cooked, stack the naan on a plate and cover it with a clean towel to trap steam this ensures the bread stays moist and pliable while you finish the rest of the batch.
Common Pitfalls & How to Fix Them
Even experienced cooks can run into challenges when making gluten-free naan bread. Because this dough behaves differently than traditional wheat-based versions, small adjustments in moisture or heat can make a big difference. Here’s a practical guide to understanding what went wrong and how to fix it next time.
The Naan Doesn’t Puff Up
This usually means your heat is too low or the dough is rolled too thick or too thin. For proper puffing, the skillet must be hot enough to trigger the baking powder and steam reaction. If the surface doesn’t bubble after 30 seconds, increase the heat slightly. Also, aim for a dough thickness of about ¼ inch any thinner and it cooks too quickly before air pockets can form; any thicker and it stays dense in the center.
The Texture Feels Gummy or Undercooked
A gummy texture is a sign of too much starch or excess moisture in the dough. Double-check your flour ratio millet should always be the main flour, with tapioca added for stretch. Avoid using pre-mixed gluten-free flour blends, which often contain too much starch. If the dough feels sticky before rolling, add a bit more millet flour to rebalance it. Cooked naan should feel soft but never doughy inside.
The Naan is Dry or Brittle
If your naan cracks or feels tough once cooled, it likely needs a touch more hydration or fat. Add an extra tablespoon of yoghurt or a teaspoon of olive oil next time to soften the texture. Also, don’t skip brushing with butter or ghee after cooking that thin layer of fat locks in moisture and adds flavor.
The Naan Looks Pale and Lacks Flavor
Without sugar, the bread won’t brown properly because there’s no caramelization. Always include a small amount of sugar (even half a teaspoon makes a difference). For deeper flavor, use a high heat briefly at the end of cooking to create charred spots.
The Dough is Too Sticky to Handle
Sticky dough is common with psyllium and starch-heavy recipes. Lightly flour your surface with millet flour before rolling and dust the top of each piece as you flatten it. You can also lightly oil your hands instead of adding more flour, which helps maintain softness.
Each of these small corrections adds up to big improvements in texture and consistency. Once you understand how the dough behaves, you’ll be able to make perfectly puffed, soft naan every single time.
Variations & Flavor Twists
One of the joys of making gluten-free naan bread at home is how easily it adapts to new flavors. Once you’ve mastered the base recipe, you can customize it to complement different cuisines or occasions. Here are a few delicious variations to try all tested to keep that signature soft, chewy texture intact.
Garlic & Herb Naan
For a classic restaurant-style twist, add two cloves of finely minced garlic and a tablespoon of chopped cilantro or parsley directly into the dough before mixing. Once cooked, brush the naan with melted butter infused with more garlic and herbs. The aroma is irresistible, and the flavor pairs perfectly with curries or lentil dishes.
Vegan Naan
To make this recipe fully plant-based, substitute the yoghurt with plain coconut or almond yoghurt and use olive oil instead of butter or ghee. Coconut yoghurt adds a hint of natural sweetness that balances savory dishes beautifully. The texture remains just as soft psyllium husk ensures the dough stays elastic even without dairy.
Spiced Naan
Elevate your flatbread with warm, aromatic spices. Add half a teaspoon each of ground cumin and coriander, or try a sprinkle of nigella seeds and chili flakes for a bolder flavor. These spices toast as the naan cooks, releasing deep, fragrant notes that complement Indian or Middle Eastern meals.
Stuffed Naan
For a hearty version, place a spoonful of mashed potato or crumbled paneer in the center of the dough ball, fold it over, and roll it gently before cooking. You’ll get a soft bread pocket filled with flavor perfect for a satisfying snack or lunch.
Sweet Dessert Naan
Yes, naan can go sweet too. Mix a bit of cinnamon and sugar into the dough, brush with melted butter after cooking, and finish with a drizzle of honey. It’s a lovely gluten-free dessert served warm with tea or coffee.
Whether you prefer savory or sweet, mild or spicy, these variations show just how versatile this gluten-free base can be. Once you’ve made it a few times, you’ll start customizing your own versions and each one will still puff beautifully and stay tender.
Serving Pairings for Every Occasion
A freshly cooked piece of gluten-free naan bread is incredibly versatile it’s more than just a side dish; it’s a bridge between flavors. Whether you’re preparing a cozy weeknight dinner or hosting a weekend feast, naan can complete the meal with warmth and texture. Here are some pairing ideas that highlight its flexibility and make every bite count.
With Classic Curries and Stews
Serve naan alongside rich, saucy curries where its soft texture shines. Think buttery chicken curry, spicy lentil dal, or a fragrant vegetable korma. The naan’s gentle chew makes it ideal for scooping up gravies and sauces without falling apart.

For Fusion and Modern Dishes
Use naan as a base for creative, globally inspired meals. Try it instead of a bun for these flavorful Burger Bowls, or serve it on the side with this hearty Prime Rib Roast to soak up those savory pan juices. It also makes a surprisingly good pizza base when topped with roasted vegetables or melted cheese.
As an Appetizer or Party Snack
Cut warm naan into wedges and pair it with dips and spreads. It’s fantastic with creamy hummus, smoky baba ganoush, or even this game-day favorite Buffalo Chicken Dip. For a plant-based option, try it with these Southern-style Black-Eyed Peas for a protein-packed, wholesome pairing.
With Soups and Salads
Naan’s subtle flavor complements soups and salads beautifully. Serve it warm with tomato bisque, lentil soup, or a crisp green salad topped with citrus vinaigrette. The contrast between soft bread and fresh greens adds balance to the meal.
For Breakfast or Brunch
Reheat leftover naan in the morning and top it with scrambled eggs, sautéed spinach, or avocado slices. Its mild flavor works just as well for sweet combinations try spreading it with almond butter, banana slices, and a drizzle of maple syrup.
From Indian classics to modern comfort food, this bread adapts effortlessly. It’s a soft, flexible canvas that turns every meal into something comforting and memorable.
How to Store, Freeze, and Reheat Without Drying Out
One of the best things about this gluten-free naan bread is that it keeps its softness long after cooking as long as it’s stored correctly. While it’s always best fresh from the skillet, these simple storage and reheating methods ensure your naan stays tender and flavorful for days.
Storing Fresh Naan
Allow the naan to cool completely before storing trapping steam while it’s still hot can make it soggy. Once cooled, layer the breads with parchment paper between them and place them in an airtight container or resealable bag. Keep at room temperature for up to 24 hours, or refrigerate for 2–3 days.
If you’re storing naan overnight, brush it lightly with melted butter or olive oil before sealing. This thin layer of fat prevents dryness and helps the bread reheat beautifully.
Freezing for Later
To freeze, wrap each naan individually in parchment paper or plastic wrap and place them in a freezer-safe bag. This prevents sticking and makes it easy to grab one or two at a time. Frozen naan will stay fresh for up to two months without losing texture. When you’re ready to enjoy it, thaw the naan at room temperature for 15–20 minutes before reheating.
How to Reheat Naan Without Losing Softness
Reheating is simple, but the right method makes all the difference:
- Microwave: Wrap naan in a slightly damp paper towel and microwave for 30–45 seconds. The steam rehydrates the bread and restores its pillowy texture.
- Stovetop: Warm a dry skillet over medium heat, lightly mist the naan with water, and heat each side for 30–45 seconds. Covering the pan for a few seconds traps steam and makes the bread soft again.
- Oven: Preheat to 350°F (180°C). Lightly sprinkle water on the naan, wrap it in foil, and warm for 5–7 minutes. This method is great for reheating multiple pieces at once.
Make-Ahead Tip:
If you like to meal prep, roll out the dough and freeze the raw naan rounds between parchment sheets. When you’re ready to cook, place the frozen naan directly on a hot skillet no thawing needed. They’ll puff up beautifully, just like fresh dough.
Handled with a little care, your naan will stay soft, flavorful, and ready to serve almost as if it was made that very day.
Final Thoughts Your Foolproof Gluten-Free Naan
Mastering gluten-free naan bread is less about chasing perfection and more about understanding balance the right mix of flours, moisture, and heat. Once you’ve made it a few times, you’ll start to feel how the dough should behave: soft but not sticky, elastic but easy to roll, delicate yet strong enough to puff. It’s a rhythm that comes naturally with practice.
This recipe captures everything we love about traditional naan the warm aroma, the tender crumb, the golden blistered spots but without gluten or yeast. It’s a bread that proves gluten-free baking doesn’t have to be complicated or disappointing. Each naan comes off the skillet soft enough to fold, strong enough to scoop, and flavorful enough to stand on its own.
Whether you’re serving it alongside a rich curry, a hearty stew, or a simple dip, this bread brings comfort to any table. It’s flexible, nourishing, and endlessly adaptable. Once you’ve tasted it warm from the pan, brushed with melted ghee or olive oil, you’ll see why it’s become a staple in my kitchen and, I hope, soon in yours too.
Follow us in Pinterest.
FAQs Expert Answers
1. Can I make gluten-free naan without yoghurt?
Yes, you can. Replace the yoghurt with plain coconut yoghurt or a dairy-free alternative with a similar texture. If the substitute is thicker than regular yoghurt, add a tablespoon of warm water to adjust consistency. The acidity in yoghurt helps soften the dough, so for best results, include a small squeeze of lemon juice to mimic that effect.
2. What’s the best gluten-free flour blend for naan bread?
It’s best to stick to the tested ratio of millet flour and tapioca starch. Most commercial gluten-free flour blends contain too much starch, which can lead to a gummy or dense result. Millet provides structure, while tapioca gives elasticity together they mimic the stretch of gluten naturally.
3. Can I bake naan in the oven instead of on the stovetop?
You can, but the results will be slightly different. To bake, preheat your oven to 475°F (245°C) and place a baking stone or heavy tray inside to heat up. Lay the naan directly on the hot surface and bake for 3–4 minutes per side until puffed and golden. You can finish it under the broiler for a few seconds to achieve the traditional charred spots.
4. How can I make it completely vegan?
This recipe is easily adapted to a vegan diet. Use dairy-free yoghurt (like almond, oat, or coconut) and vegan butter or olive oil for brushing. Psyllium husk already provides the structure that eggs or gluten typically contribute, so no additional binders are needed.
5. Why is psyllium husk essential in this recipe?
Psyllium husk replaces gluten by forming a gel that binds water and traps air, giving the naan flexibility and chew. Without it, the dough would be crumbly and wouldn’t puff properly during cooking. Always use whole or “blond” psyllium husk for best texture and a neutral flavor.
The Science Behind the Perfect Gluten-Free Naan Bread
This soft and pillowy gluten-free naan bread is made without yeast and ready in under 45 minutes.
It’s chewy, flavorful, and perfect for pairing with curries or dips.
- Prep Time: 20 mins
- Cook Time: 25 mins
- Total Time: 45 mins
- Yield: 8 naan 1x
- Category: Bread
- Method: Stovetop
- Cuisine: Indian
Ingredients
235 g millet flour
130 g tapioca starch
20 g whole psyllium husk
360 g warm water
75 g plain or Greek-style yoghurt
25 g olive oil
1 tbsp sugar
1½ tsp baking powder
1 tsp salt
45 g melted butter or ghee
1 tbsp chopped parsley or cilantro
Instructions
1. Mix the psyllium husk with warm water and let it sit until thickened.
2. Whisk together millet flour, tapioca starch, sugar, baking powder, and salt.
3. Combine psyllium gel, yoghurt, and olive oil; add to dry mixture and knead until smooth.
4. Divide dough into 8 balls and roll each out to ¼ inch thickness.
5. Cook each naan on a hot skillet for 1–2 minutes per side until puffed and golden.
6. Brush with melted butter or ghee and sprinkle with herbs before serving.
Notes
Use millet flour as the main flour for structure.
Avoid using 1:1 gluten-free flour blends — they make the dough gummy.
You can use coconut yoghurt for a vegan version.
Store cooked naan in an airtight container for up to 3 days or freeze for later.
Nutrition
- Serving Size: 1 naan
- Calories: 190
- Sugar: 2g
- Sodium: 230mg
- Fat: 6g
- Saturated Fat: 2g
- Unsaturated Fat: 3g
- Trans Fat: 0g
- Carbohydrates: 28g
- Fiber: 5g
- Protein: 4g
- Cholesterol: 10mg


