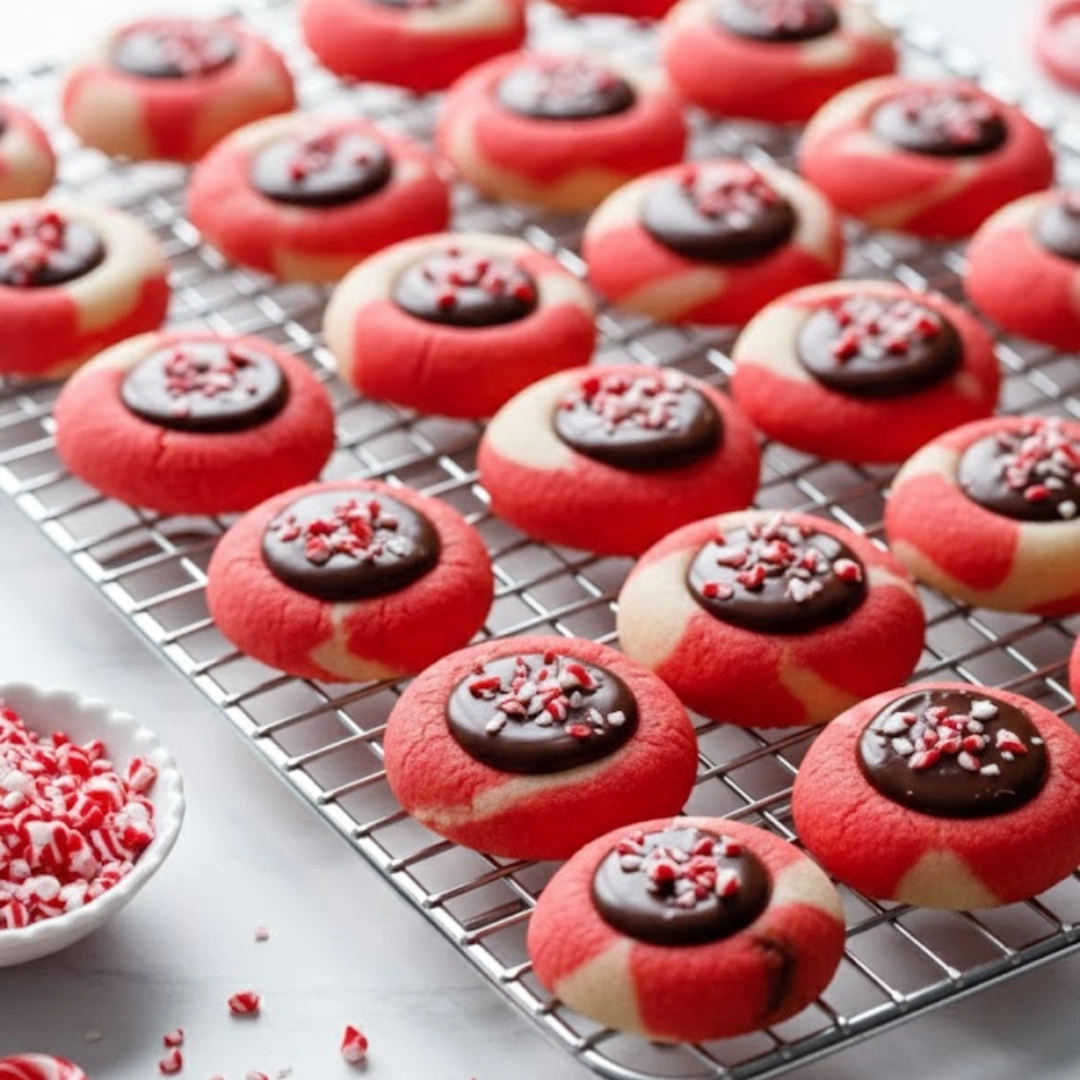
Creating the perfect Chocolate Peppermint Thumbprints is a culinary rite of passage for any home baker. These cookies embody everything a classic treat should be: a deeply rich, tender chocolate base cradling a velvety, cool peppermint filling, all crowned with crunchy candy cane pieces. Based on my many years of experience refining classic cookie recipes, this version offers a reliable method guaranteed to produce flawless results every time. We’ve meticulously tested the dough consistency and chilling times to ensure your cookies maintain their shape and deliver a luxurious, melt-in-your-mouth texture.
The Ultimate Holiday Cookie: Why Everyone Loves Chocolate Peppermint Thumbprints
These cookies are consistently a favorite on any dessert table, not just for their striking appearance but for the intense flavor experience they provide.
A Perfect Blend of Rich Cocoa and Cool Peppermint
The pairing of rich, slightly bitter dark cocoa and the sharp, refreshing scent of peppermint is a classic for a reason. This recipe balances those two powerful notes perfectly. The cookie dough itself uses Dutch-process cocoa, which gives it a darker color and a smoother, less acidic flavor, providing a deep base that truly allows the cool peppermint ganache filling to shine.
Culinary Confidence: A Tested Recipe You Can Trust
As someone who has cooked and baked this dish for years, I understand the small details that make a big difference. Thumbprint cookies can be tricky; they often spread, crack, or lose their filling. This recipe is designed with precise measurements and specific techniques—like the chilling process—to ensure your cookies hold their signature indentation, bake evenly, and remain beautifully tender. You can bake these Chocolate Peppermint Thumbprints with absolute confidence.
What You Need: Ingredients for this Festive Treat
The quality of your ingredients directly impacts the final flavor. For a cookie this simple, using the best ingredients you can find is paramount.
Ingredient List & Measurements
| Ingredient | Measurement | Notes |
| All-Purpose Flour | $1 \frac{3}{4}$ cups | Spooned and leveled |
| Unsweetened Cocoa Powder | $\frac{1}{2}$ cup | Dutch-process recommended |
| Baking Soda | 1 teaspoon | For leavening |
| Salt | $\frac{1}{2}$ teaspoon | Enhances chocolate flavor |
| Unsalted Butter | 1 cup (2 sticks) | Softened to room temperature |
| Granulated Sugar | $\frac{3}{4}$ cup | For structure and sweetness |
| Egg | 1 large | Room temperature |
| Vanilla Extract | 1 teaspoon | |
| For the Ganache | ||
| Semi-Sweet or Dark Chocolate | 4 ounces | Finely chopped or chips |
| Heavy Cream | $\frac{1}{2}$ cup | |
| Peppermint Extract | $\frac{1}{2}$ teaspoon | Use pure extract for best flavor |
| For Topping | ||
| Crushed Candy Canes | $\frac{1}{4}$ cup |

Peppermint Perfection: Tips from a Pastry Chef
When working with peppermint extract, remember that a little goes a long way. Based on my experience adjusting flavors for different palates, I recommend starting with the specified amount and resisting the urge to add more until you’ve tasted the ganache. Too much peppermint can quickly taste medicinal.
Simple Instructions for Festive Chocolate Peppermint Thumbprints
Step-by-Step Dough Preparation (The Quick Chill Method)
- Combine Dry Ingredients: Whisk together the flour, cocoa powder, baking soda, and salt in a medium bowl. Set aside.
- Cream Butter and Sugar: In a large bowl or stand mixer, beat the softened butter and granulated sugar until the mixture is light and fluffy, about 3 minutes.
- Add Wet Ingredients: Beat in the egg and vanilla extract until just combined.
- Incorporate Dry Mix: Gradually add the dry ingredient mixture to the wet ingredients, mixing on low speed until the dough just comes together. Do not overmix.
- Chill: Form the dough into a disc, wrap it tightly in plastic wrap, and chill for at least 30 minutes. This chilling time is crucial; it re-solidifies the fat, which is the “no spread” secret that helps the Chocolate Peppermint Thumbprints maintain their perfect shape during baking.

Baking and Creating the ‘Thumbprint’ Cavity
- Preheat and Prepare: Preheat your oven 350 or 175 . Line baking sheets with parchment paper.
- Scoop and Roll: Scoop the dough into 1-inch balls (about 1 tablespoon each). Roll them smoothly between your palms.
- Indentation: Place the rolled balls on the prepared baking sheet. Using the back of a $\frac{1}{2}$-teaspoon measuring spoon or your thumb, gently press an indentation into the center of each cookie. If the edges crack slightly, just smooth them back with your fingers.
- Bake: Bake for 9–11 minutes. The cookies will look slightly set and the centers may look a little soft. Do not overbake.
- Re-indent: Immediately after removing the cookies from the oven, use the $\frac{1}{2}$-teaspoon measure again to gently press down the centers once more, as the dough puffs up slightly during baking. Let them cool completely on the baking sheet before filling.
Filling the Cookies with Rich Peppermint Ganache
- Melt Chocolate: Place the finely chopped chocolate or chips in a heatproof bowl.
- Heat Cream: Heat the heavy cream in a small saucepan until it just begins to simmer around the edges.
- Pour and Wait: Pour the hot cream over the chocolate. Let it stand undisturbed for 5 minutes to allow the heat to melt the chocolate fully.
- Emulsify: Whisk the mixture gently from the center outward until the ganache is smooth, shiny, and fully emulsified.
- Add Flavor: Stir in the peppermint extract. Allow the ganache to cool and thicken at room temperature for about 30–60 minutes until it reaches a thick, spoonable consistency.
Assembly and Decoration with Crushed Candy
- Fill: Use a small spoon or piping bag to fill the cooled Chocolate Peppermint Thumbprints cavities with the thickened peppermint ganache.
- Garnish: Immediately sprinkle the tops of the ganache with the crushed candy canes before the ganache sets.
- Set: Allow the cookies to set for at least 30 minutes at room temperature before serving or storing.
Customizing Your Holiday Chocolate Peppermint Thumbprints
Part of the fun of home baking is making a recipe your own. Here are some simple, yet impactful, variations.
Flavor Variations: Beyond the Standard Extract
- Orange: Substitute orange extract for the peppermint extract in the ganache for a delicious chocolate-orange twist.
- Almond: Use almond extract in the dough instead of vanilla, and a tiny drop in the ganache for a nutty complement to the chocolate.
Alternative Toppings and Decorations
While the crushed candy cane is iconic, you can try other toppings:
- White Chocolate Drizzle: Drizzle the finished cookies with melted white chocolate for an elegant look.
- Flaky Salt: A tiny sprinkle of flaky sea salt on the dark chocolate cookie base can cut the sweetness beautifully.
Serving Suggestions and Pairing Ideas
These cookies are rich and satisfying. They pair wonderfully with a simple cup of coffee or hot tea. For a contrast in flavor and texture on a buffet spread, consider serving them alongside something savory and fresh, like a light pasta salad. For example, the flavors would complement a good Grinder Pasta Salad recipe.
Storage and Prep: Making Chocolate Peppermint Thumbprints Ahead
Proper storage is essential for maintaining the texture and flavor of your treats.
Dough and Cookie Storage
- Baked Cookies: Store baked, cooled, and filled cookies in an airtight container at room temperature for up to 5 days. Layer them with parchment paper to prevent the candy cane topping from sticking or melting into the ganache.
- Cookie Dough: The unbaked dough can be wrapped tightly and refrigerated for up to 3 days. When ready to bake, let it sit at room temperature for 15 minutes before rolling and shaping.
Freezing Instructions
You have two great options for freezing:
- Freezing Dough: Shape the dough into balls, indent them, and then freeze them on a baking sheet until solid. Transfer the frozen dough balls to a freezer-safe zip-top bag. Bake directly from frozen, adding 2–3 minutes to the baking time.
- Freezing Baked Cookies: Bake the cookies, let them cool, and freeze them unfilled in an airtight container for up to 3 months. Thaw completely at room temperature, then prepare the ganache and fill just before serving.

Nutritional Notes (The Health Benefits of Dark Chocolate)
While these Chocolate Peppermint Thumbprints are an indulgent treat, using high-quality dark chocolate in the ganache can offer small nutritional perks. Dark chocolate (70% cocoa or higher) is known to contain beneficial antioxidants and flavonoids. Of course, the primary ingredients here are still butter and sugar. Enjoy them mindfully as part of a balanced diet.
This content is for educational purposes only and does not replace professional dietary or medical advice.
Frequently Asked Questions About Chocolate Peppermint Thumbprints
Can I make the dough for Chocolate Peppermint Thumbprints ahead of time?
Yes, you absolutely can. The dough can be prepared, wrapped in plastic, and refrigerated for up to 3 days. This actually benefits the flavor, as it gives the cocoa more time to hydrate, resulting in a deeper chocolate taste. Let the dough sit at room temperature for about 15 minutes before rolling.
What’s the best way to crush the candy canes for the topping?
The easiest and least messy way is to place the unwrapped candy canes in a heavy-duty, zip-top plastic bag and seal it tightly, pressing out all the air. Use a rolling pin or the flat bottom of a heavy skillet to crush them until you achieve a mix of fine powder and small, chunky pieces. Avoid crushing them into a powder only, as the chunks provide a nice textural crunch.
How do I prevent my thumbprint cookies from spreading while baking?
The two most critical factors are chilling the dough (as detailed in the instructions) and using cold baking sheets. If you are baking multiple batches, make sure your baking sheets are fully cool before placing the next batch of dough on them. You can also slightly increase the flour by 1 tablespoon if you live in a very warm or humid environment, as this helps absorb excess moisture and fat.
PrintDecadent Homemade Chocolate Peppermint Thumbprints: The Essential Holiday Recipe

This recipe for Chocolate Peppermint Thumbprints delivers rich chocolate cookies filled with a smooth peppermint ganache and topped with crushed candy canes, perfect for any special occasion.
- Prep Time: 30 mins
- Cook Time: 11 mins
- Total Time: 1 hr 30 mins
- Yield: 30 cookies 1x
- Category: Dessert
- Method: Baking
- Cuisine: American
Ingredients
1 3/4 cups All-Purpose Flour
1/2 cup Unsweetened Cocoa Powder (Dutch-process)
1 teaspoon Baking Soda
1/2 teaspoon Salt
1 cup (2 sticks) Unsalted Butter, softened
3/4 cup Granulated Sugar
1 large Egg, room temperature
1 teaspoon Vanilla Extract
4 ounces Semi-Sweet or Dark Chocolate, finely chopped
1/2 cup Heavy Cream
1/2 teaspoon Peppermint Extract
1/4 cup Crushed Candy Canes
Instructions
1. Combine the flour, cocoa powder, baking soda, and salt. In a separate bowl, cream the butter and sugar until light and fluffy. Beat in the egg and vanilla. Gradually mix in the dry ingredients until just combined.
2. Wrap the dough and chill for at least 30 minutes. Preheat oven to 350°F (175°C). Roll dough into 1-inch balls and place on a lined baking sheet. Use a 1/2-teaspoon measure to gently press an indentation into the center of each cookie.
3. Bake for 9–11 minutes. Immediately upon removal from the oven, re-press the indentation. Cool completely on the baking sheet.
4. Place chocolate in a bowl. Heat heavy cream until simmering, then pour over chocolate. Let stand 5 minutes, then whisk until smooth. Stir in the peppermint extract. Let cool and thicken for 30–60 minutes.
5. Fill the cooled cookie cavities with the thickened peppermint ganache. Immediately sprinkle the tops with crushed candy canes. Allow the ganache to fully set before serving.
Notes
The chilling time is crucial for preventing spread and achieving the perfect shape.
For the best flavor, use high-quality Dutch-process cocoa powder.
Store baked cookies in an airtight container at room temperature for up to 5 days.
Nutrition
- Serving Size: 1 cookie
- Calories: 150
- Sugar: 8g
- Sodium: 40mg
- Fat: 8g
- Saturated Fat: 5g
- Unsaturated Fat: 2g
- Trans Fat: 0g
- Carbohydrates: 18g
- Fiber: 1g
- Protein: 2g
- Cholesterol: 25mg


