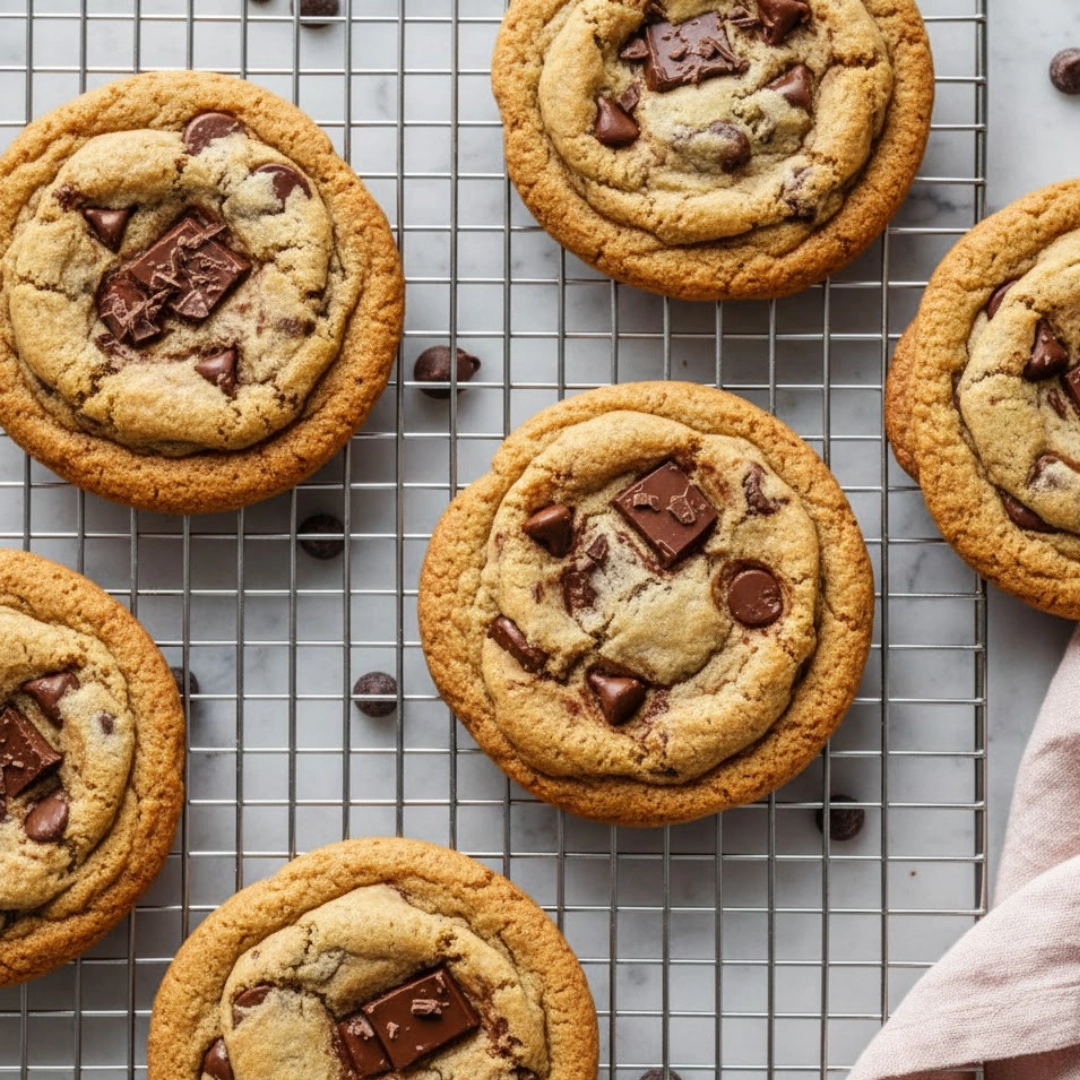
There is perhaps no more universally beloved baked good than the classic, golden-edged, deeply satisfying chocolate chip cookie. It is a benchmark for home baking, representing simple ingredients transformed by careful technique into something extraordinary. This particular approach emphasizes texture—a perfect trifecta of crisp edges, a robustly chewy center, and pockets of molten, rich chocolate. Mastering this recipe means understanding the critical relationship between butter temperature and sugar combination, leading to a truly transcendent cookie experience that is essential for any baker’s repertoire.
Table of Contents
The Essential Pantry List
Achieving the perfect balance of flavor and texture requires high-quality ingredients measured with precision.
For the Dry Mix:
- Two and a quarter cups (315 grams) all-purpose flour
- One teaspoon baking soda
- One teaspoon fine sea salt
For the Wet Mix and Flavor:
- One cup (two sticks or 226 grams) unsalted butter, melted and cooled
- Three-quarters cup (150 grams) granulated sugar
- One cup (215 grams) packed light brown sugar
- Two large eggs, at room temperature
- Two teaspoons pure vanilla extract
The Chocolate Component:
- One and a half cups (255 grams) semi-sweet chocolate chips or chopped baking bars (use a mix for best results)
Foundational Technique: Mixing the Dough
The method of combining the ingredients dictates the final structure of the cookie. Unlike many recipes that call for creaming butter and sugar, we begin by melting the butter to unlock a deeper chewiness and richer, more toffee-like flavor.
- Melt the Butter: In a small, heat-safe pan, melt the butter over low heat. Pour it into a large mixing bowl and allow it to cool for approximately ten minutes, ensuring it is warm to the touch but not hot enough to scramble the eggs.
- Combine Sugars: Whisk the granulated sugar and brown sugar into the cooled melted butter until completely smooth and incorporated.
- Add Eggs and Vanilla: Whisk in the eggs one at a time, ensuring the first is fully incorporated before adding the next. Stir in the vanilla extract. The mixture should be thick and glossy.
- Integrate the Dry Elements: In a separate medium bowl, whisk together the flour, baking soda, and salt. Gradually add the dry ingredients to the wet mixture, mixing on low speed or by hand only until the last streaks of flour disappear. Avoid overmixing.
- Fold in Chocolate: Gently fold in the chocolate chips and chunks until they are evenly distributed throughout the dough.
- Chill the Dough: Cover the bowl tightly with plastic wrap and refrigerate the dough for a minimum of two hours, or preferably up to twenty-four hours, for the best result.

Shaping and Baking Protocol
Once the dough is properly rested, the baking process is straightforward, but it requires vigilance regarding the timing and visual indicators of doneness.
- Preheat and Prepare: Arrange your oven racks to the center positions and preheat the oven to three hundred fifty Fahrenheit. Line two large baking sheets with parchment paper or silicone baking mats.
- Portion the Dough: Use a medium cookie scoop (about three tablespoons) to portion the dough. Roll each scoop gently between your palms to form a smooth ball.
- Arrange on Sheets: Place the dough balls onto the prepared sheets, leaving at least three inches of space between each to account for spreading.
- Bake in Batches: Bake the cookies one sheet at a time for twelve to fifteen minutes. The exact timing will depend heavily on your oven.
- Check for Doneness: The cookies are done when the edges are set and deeply golden brown, but the centers still look slightly pale, puffy, and underbaked.
- Cooling Procedure: Immediately slide the parchment paper with the cookies onto a wire rack. Let them cool on the parchment for at least ten minutes before attempting to move them directly to the cooling rack.

Achieving the Ideal Texture: A Deeper Dive
The quality of a cookie is defined by its structure, which is entirely controlled by technique. The use of melted butter and an elevated ratio of brown sugar are the key levers here, but attention to detail in the final steps prevents a disappointing, cakey, or overly flat cookie.
The Critical Role of Butter
By melting the butter, we are essentially reducing the amount of moisture in the fat, which inhibits the formation of gluten when combined with the flour. This action encourages spreading and contributes heavily to the signature chewy texture. However, the butter must be allowed to cool before the sugars and eggs are added. If the butter is too hot, it will prematurely dissolve the sugars, leading to excessively greasy edges and a caramelized, gritty texture, and worse, it will begin to cook the proteins in the egg, resulting in a cakey, dry interior. The sweet spot is when the butter is cool enough that you can dip your finger in without discomfort—slightly above room temperature, but far from hot.
Integrating the Dry Elements
When incorporating the flour mixture, the critical mistake to avoid is overmixing. Once the flour hits the liquid, gluten strands begin to develop, giving the cookie structure. Too much mixing activates too much gluten, which leads to a tough, dense, and potentially dry cookie. The goal is to mix only until the flour is barely incorporated. A few wisps of flour still visible are far preferable to a homogenous, overworked dough. This stage is best handled by hand with a spatula, or on the absolute lowest speed of a stand mixer, stopping the moment the mixture looks cohesive.
Resting and Ripening (Chilling)
Chilling the dough is not a suggestion; it is a foundational step for flavor and texture. During the resting period, three essential things occur:
- Hydration: The flour absorbs the moisture from the wet ingredients, which prevents the dough from spreading too quickly in the oven and results in a thicker cookie.
- Concentration: The flavors in the dough—especially the salt and vanilla—have time to integrate and deepen. The simple act of waiting yields a more complex, satisfying, and toffee-like flavor profile.
- Solidification: The fats solidify. When the cold dough hits the hot oven, the fat takes longer to melt, providing crucial time for the edges to set before the center collapses, ensuring that desirable thickness and chew. A dough chilled for twenty-four hours will yield a superior depth of flavor and texture compared to one chilled for just two.
Visual Cues for Perfect Doneness
Never rely solely on the timer. Ovens vary dramatically, and the true indicator of a perfect chocolate chip cookies is visual.
When you pull the baking sheet from the oven, the cookies should not look fully baked. The edges should have transformed into a rich, deep golden-brown, a clear signal that the sugars have caramelized and set. However, the very center of the cookie should still appear soft, pale, and slightly puffy. It may even look slightly wet. This raw-looking center is essential. The residual heat from the baking sheet and the surrounding cookie structure will continue to cook the center as it rests on the pan, a process known as carry-over baking. If you wait until the center is set in the oven, you will end up with an overbaked, brittle, and dry cookie once it cools completely.
Troubleshooting Common Cookie Flaws
| Problem | Cause | Solution |
| Too Flat/Greasy | Butter was too hot when mixed with sugar, or insufficient flour was used, or the dough was not chilled long enough. | Ensure the melted butter is cooled completely. Always chill the dough for at least two hours. If necessary, add one to two tablespoons more flour. |
| Too Cakey/Dry | Too much flour was used, or the dough was overmixed, activating too much gluten. | Use the “scoop and level” method for measuring flour (spoon flour into the measuring cup, then level the top). Mix only until just combined. |
| Hard Edges/Raw Centers | Oven temperature is too high, or the baking time was too long for the amount of dough. | Check your oven calibration with an oven thermometer. Reduce the baking temperature by twenty-five Fahrenheit degrees and check the cookies earlier. |
| No Flavor Depth | Insufficient chilling time, or low-quality ingredients (especially vanilla and salt). | Always use pure vanilla extract, not imitation. Use fine sea salt or kosher salt, not iodized table salt. Chill the dough for twenty-four hours. |
Elevating Your Batch: Master Baker Secrets
These simple adjustments move your baking from good to truly exceptional, ensuring a consistent, professional-level result every time.
- The Flour Weight Standard: For precise, repeatable results, weigh your flour. A cup of all-purpose flour can vary significantly depending on how densely it is packed. The standard weight of 315 grams for two and a quarter cups removes all guesswork and is the single greatest step toward consistency.
- Salted Butter Swap: If using salted butter instead of unsalted, eliminate the one teaspoon of added salt from the recipe. If you prefer a slightly saltier flavor profile, reduce the added salt by half (to one-half teaspoon) and taste a small crumb of dough before chilling.
- The Chocolate Shave: Use a mix of chocolate chips and rough-chopped high-quality chocolate baking bars (about half and half). The chips hold their shape, while the chopped pieces create puddles of melted, messy chocolate throughout the interior of the cookie, enhancing both texture and visual appeal.
- Flaky Sea Salt Finish: Immediately after removing the baked cookies from the oven, sprinkle a tiny pinch of flaky sea salt (like Maldon) over the top of each cookie. This small burst of salt provides a vital contrast to the sweetness and heightens the overall complexity of the flavor.
- The “Pan Bang” Technique: Around the ten-minute mark of baking, when the cookies are puffed up, open the oven and gently but firmly lift the baking sheet and drop it back down onto the rack. This sudden jolt deflates the center of the cookie, creating those desirable wrinkles and ripples, and concentrates the structure at the edges, ensuring a chewier texture.
- Avoid Silicone Mats for Spread: While silicone mats are excellent for cleanup, they can sometimes inhibit the natural spread of the cookie dough, leading to a slightly taller, less chewy result. If you prioritize chewiness and spread, use quality parchment paper instead.
Creative Interpretations and Swaps
The foundational dough provides a superb canvas for various flavor additions and substitutions, allowing you to tailor this recipe to any preference.
- Nutty Crunch: Incorporate a half-cup of toasted, chopped pecans or walnuts alongside the chocolate chips. Toasted nuts enhance the flavor considerably; simply spread them on a baking sheet and toast them for five minutes at three hundred fifty Fahrenheit before cooling and adding.
- Alternative Sugars: For a slight twist on the flavor, substitute ten percent of the brown sugar with dark molasses. This swap increases the moisture and results in an even darker, more intensely caramelized cookie. Do not substitute more than ten percent, or the texture may become gummy.
- The Spice Element: Introduce one teaspoon of ground cinnamon and a half-teaspoon of ground nutmeg with the flour mixture. These spices lend a warming, holiday-like depth that pairs wonderfully with the vanilla and brown sugar.
- Gluten-Free Flour: This recipe adapts well to a one-for-one gluten-free baking blend that includes xanthan gum. The required chilling time is even more critical when using GF flour, as it allows the gums to fully hydrate and provide the necessary structure.
- Mix-In Variety: Beyond traditional chocolate, experiment with white chocolate chips, butterscotch morsels, or even a quarter-cup of toffee bits (Heath bar pieces) for added crunch and flavor variation.
Best Practices for Serving and Storage
A truly great cookie is versatile enough to be enjoyed fresh or saved for later. Proper handling ensures maximum enjoyment.
- Serving Warm: The most classic way to enjoy these cookies is warm, approximately fifteen minutes after they have come out of the oven. At this point, the chocolate is still molten and gooey, contrasting beautifully with the chewy, caramelized dough. A glass of cold whole milk is the traditional and perfect accompaniment.
- Ice Cream Sandwich Base: The slightly thick and sturdy nature of these cookies makes them an ideal base for homemade ice cream sandwiches. Sandwich a scoop of high-quality vanilla or coffee ice cream between two fully cooled cookies and freeze for thirty minutes to set before serving.
- Storage of Baked Cookies: Store fully cooled cookies in an airtight container at room temperature for up to four days. To preserve their original softness and chewiness, place a small half-slice of plain white bread inside the container; the cookies will absorb the moisture from the bread.
- Freezing Unbaked Dough: Cookie dough freezes exceptionally well. Scoop the chilled dough into balls, place them close together on a parchment-lined tray, and freeze until solid. Transfer the frozen dough balls to a zip-top freezer bag. They can be baked directly from frozen by adding two to three minutes to the specified bake time. This is a perfect way to ensure you always have fresh, warm Chocolate Chip Cookies on demand.
Clarifying Your Cookie Questions
Here are answers to common queries that arise when perfecting this classic dessert.
Can I make a double batch of this dough?
Absolutely. You can safely double or even triple the batch size, but ensure you mix the dough thoroughly so that all ingredients are evenly distributed. If using a stand mixer, you may need to mix in two separate bowls to avoid overworking the machine or compacting the dough.
Why did my cookies not spread at all?
The primary reason for zero spread is usually too much flour or insufficient moisture. Make sure you are not overpacking your measuring cups. Also, if you use cold eggs or butter, the dough’s structure will be too firm to melt and spread properly in the oven, leading to tall, pale cookie mounds.
What is the best type of chocolate to use for the most decadent result?
A premium dark chocolate (around sixty-five percent cacao) is ideal, as it offers a pleasant bitterness that balances the sweetness of the dough. Chopping a good-quality dark chocolate bar into random-sized chunks provides superior texture compared to uniform chips, yielding pockets of fudgy chocolate across the cookie.
How do I adjust this recipe for high altitude?
Baking at high altitudes often requires an adjustment in the leavening agents and liquid, as moisture evaporates more quickly. You can try decreasing the baking soda by twenty percent and adding one or two tablespoons of extra flour to firm up the dough structure, preventing excessive spread.
Is it really necessary to use both brown and granulated sugar?
Yes, the combination is critical for texture. Granulated sugar promotes spread and crispness, while brown sugar contains molasses, which adds deep flavor, moisture, and ensures the signature chewy interior. Using only one type will fundamentally change the cookie’s texture profile.

Nutritional Snapshot
| Nutrient | Amount per Serving |
| Calories | 245 kcal |
| Protein | 3 g |
| Carbs | 32 g |
| Fat | 12 g |
| Fiber | 1 g |
| Sugar | 21 g |
| Sodium | 130 mg |
Disclaimer
Nutrition information is an estimate and may vary based on preparation and ingredients used.
PrintThe Ultimate Chocolate Chip Cookies Recipe
An expert US-based recipe for classic, chewy chocolate chip cookies, leveraging the melted butter technique and proper dough chilling for unparalleled texture and rich, toffee-like flavor.
- Prep Time: 30 mins
- Cook Time: 15 mins
- Total Time: 2 hours 45 mins
- Yield: 24 cookies 1x
- Category: Dessert
- Method: Baking
- Cuisine: American
Ingredients
2 and 1/4 cups (315 grams) all-purpose flour
1 teaspoon baking soda
1 teaspoon fine sea salt
1 cup (2 sticks or 226 grams) unsalted butter, melted and cooled
3/4 cup (150 grams) granulated sugar
1 cup (215 grams) packed light brown sugar
2 large eggs, at room temperature
2 teaspoons pure vanilla extract
1 and 1/2 cups (255 grams) semi-sweet chocolate chips or chopped baking bars
Instructions
1. Melt the butter in a small pan and transfer it to a large mixing bowl. Allow it to cool for ten minutes until it is warm but not hot.
2. Whisk the granulated sugar and brown sugar into the cooled melted butter until the mixture is smooth.
3. Add the two large eggs one at a time, incorporating each fully before adding the next. Stir in the vanilla extract.
4. In a separate bowl, whisk together the flour, baking soda, and salt. Gradually add the dry ingredients to the wet, mixing only until the last streaks of flour disappear.
5. Fold in the chocolate chips and chopped baking bars until they are evenly distributed throughout the dough.
6. Cover the bowl and refrigerate the dough for a minimum of two hours, or up to twenty-four hours for enhanced flavor.
7. Preheat the oven to three hundred fifty Fahrenheit. Scoop the dough into three-tablespoon balls and place them three inches apart on a parchment-lined baking sheet.
8. Bake one sheet at a time for twelve to fifteen minutes, or until the edges are deep golden brown and the centers still appear soft and underbaked.
9. Cool the cookies on the baking sheet for ten minutes before transferring them to a wire rack to finish cooling completely.
Notes
Chill the dough for at least two hours for the best chewy texture.
Sprinkle flaky sea salt on top immediately after removing them from the oven.
Use a mix of chips and chopped chocolate for superior melted puddles.
Nutrition
- Serving Size: 1 cookie
- Calories: 245
- Sugar: 21g
- Sodium: 130mg
- Fat: 12g
- Saturated Fat: 7g
- Unsaturated Fat: 4g
- Trans Fat: 0g
- Carbohydrates: 32g
- Fiber: 1g
- Protein: 3g
- Cholesterol: 25mg


