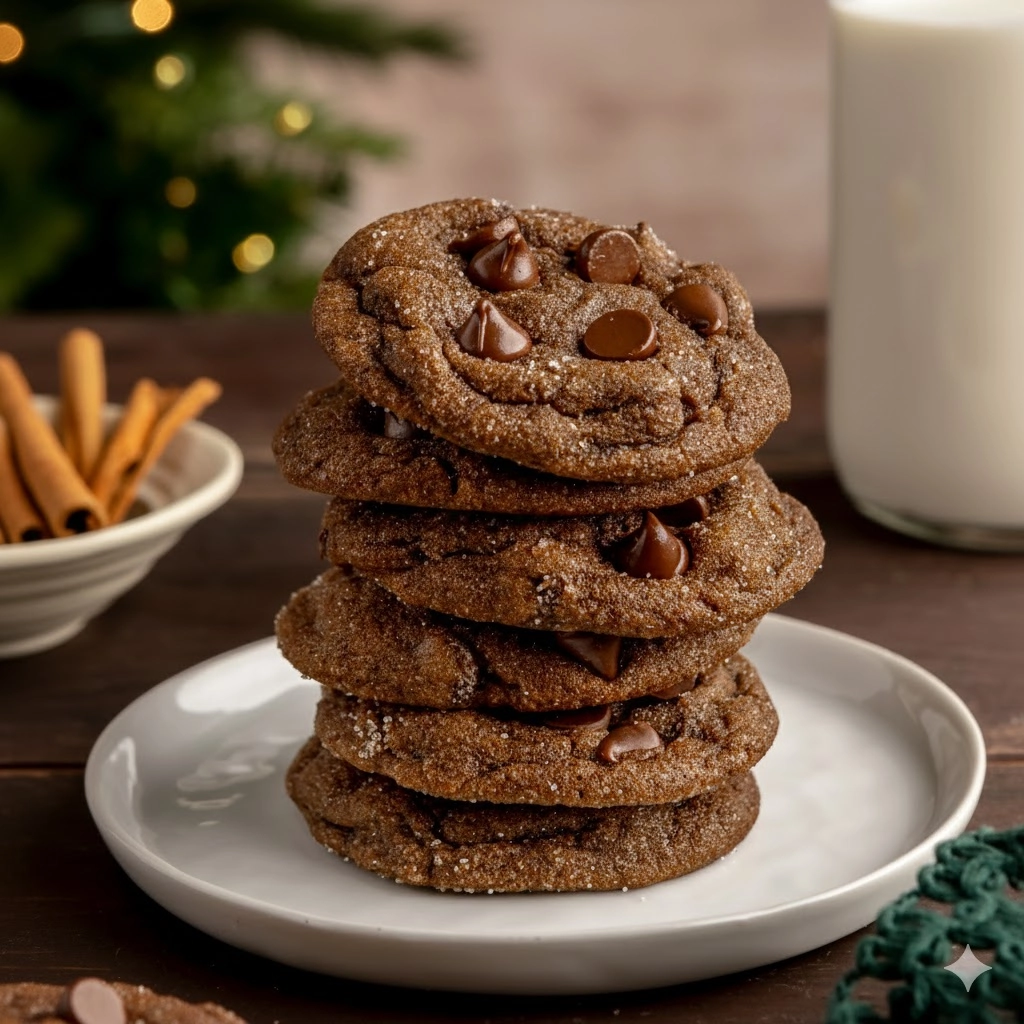
A great gingerbread cookie should have a deep spice flavor, but the texture is what truly separates the average batch from the outstanding. This recipe delivers a perfectly soft, pliable center with just the right amount of chewiness—not thin and crispy like a snap, and certainly not hard and crumbly. The addition of cocoa powder brings a lovely richness that pairs beautifully with the warm, dark spices like cinnamon and cloves, elevating the traditional cookie into something truly special. They are especially wonderful for holiday baking but simple enough to mix up any time you crave a sophisticated, deeply flavored treat.
This batch focuses on simplicity and flavor depth. We rely on strategic chilling and the right balance of sweeteners to ensure that classic, melt-in-your-mouth interior that makes a cookie truly irresistible. Forget the tough, dry versions you may have encountered; these are moist, deeply spiced, and have an elegant complexity thanks to the chocolate note woven throughout the dough.
Table of Contents
Ingredients
This recipe yields approximately 2 dozen cookies.
For the Dry Mix:
- 2 ¼ cups (270 g) all-purpose flour
- ¾ cup (64 g) unsweetened cocoa powder, natural or Dutch-process
- 1 teaspoon baking soda
- 1 teaspoon ground cinnamon
- 1 teaspoon ground ginger
- ½ teaspoon ground cloves
- ¼ teaspoon ground nutmeg
- ½ teaspoon fine sea salt

For the Wet Mix:
- ½ cup (1 stick or 113 g) unsalted butter, softened
- ½ cup (100 g) granulated sugar
- ½ cup (110 g) packed dark brown sugar
- 1 large egg, room temperature
- ¼ cup (80 g) blackstrap molasses (or dark molasses)
- 1 teaspoon vanilla extract
For the Coating:
- ½ cup (100 g) granulated sugar, for rolling
Instructions
- Prep the Oven and Dry Ingredients: Preheat your oven to 350°F (175°C). Line two large baking sheets with parchment paper or silicone mats. Whisk together all the dry ingredients (flour through salt) in a medium bowl and set aside, ensuring no clumps of cocoa powder remain.
- Cream the Fats and Sugars: In a stand mixer fitted with the paddle attachment, or a large bowl using a hand mixer, beat the softened butter, granulated sugar, and brown sugar on medium speed until the mixture is light, pale, and fluffy, a process that takes a full 3 minutes.
- Add Wet Ingredients: Beat in the egg until fully combined, scraping down the sides of the bowl to ensure everything is integrated. Incorporate the molasses and vanilla extract, mixing until just combined. The mixture may look slightly separated.
- Combine Wet and Dry: Reduce the mixer speed to low. Gradually add the prepared dry ingredient mixture in three additions, mixing only until just combined and no large streaks of flour remain. Do not overmix the dough once the flour has been added.
- Chill the Dough (Recommended): Cover the dough bowl tightly with plastic wrap and chill in the refrigerator for 30 minutes to 1 hour. This step allows the dough to firm up and the flavors to deepen.
- Shape and Coat: Place the extra granulated sugar in a shallow dish for rolling. Scoop the dough into 1.5-inch balls (about 2 tablespoons each). Roll each ball first between your palms until smooth, then roll generously in the coating sugar until fully covered.
- Bake: Arrange the coated dough balls on the prepared baking sheets, ensuring they are spaced about 2 inches apart. Bake for 9–11 minutes.
- Cool: The cookies will look slightly puffy and soft when they are done. Let them cool undisturbed on the baking sheet for 5 minutes before carefully transferring them to a wire rack to cool completely.
Step-by-Step Details
Achieving a truly chewy texture relies on careful attention at every stage, from measuring your spices accurately to understanding what the dough should feel like before it hits the oven. Here is a deeper dive into the execution of the recipe, ensuring your Chewy Chocolate Gingerbread Cookies turn out just right.
On Preparing the Dry Mix and Spices: The balance of spices is what defines gingerbread, and the addition of cocoa powder here is the signature twist. Precision in measurement is key for the spices (ginger, cinnamon, cloves, nutmeg). If any of these are dominant, the cookie’s flavor will be unbalanced. It’s highly recommended to sift or thoroughly whisk the cocoa powder and spices with the flour. Cocoa powder is hydroscopic and tends to clump easily. If those clumps remain, they will not properly hydrate in the dough, leading to dry pockets of unmixed cocoa in your final product. Check that your baking soda is fresh, as its leavening power is crucial for the internal rise and softness. Old leavening agents lead to flat, dense cookies that lack the desired internal structure. The use of fine sea salt rather than coarse kosher salt ensures quick, even distribution of salinity throughout the mixture.

The Technique of Creaming Butter and Sugar: The creaming process (Step 2) is foundational to the cookie’s final texture. When you beat the butter and sugar, the sharp edges of the sugar crystals cut into the solid fat, trapping air bubbles. This is mechanical aeration, and it’s what gives the cookie its lift and tender crumb. The mixture should change visibly: from a dense, slightly yellow mass to a much paler, significantly more voluminous mixture. This transition requires the full three minutes of beating. If the butter is too warm (liquid or greasy), it won’t hold the air, resulting in flat, greasy cookies. If it’s too cold (hard), the mixer will struggle, and the creaming won’t happen. The butter should bend easily but not melt under pressure.
Handling Emulsion in the Wet Stage: The addition of the egg, vanilla, and particularly the molasses in Step 3 introduces significant liquid. When these liquids are added to the creamed mixture, the delicate emulsion (air and fat) can temporarily break. It may appear curdled or separated, resembling cottage cheese. This is a very common troubleshooting point for bakers. The key is to scrape the bowl well after adding the egg, ensuring the fat and sugar at the bottom and sides are fully incorporated. When the molasses is added, the mixture will darken rapidly and likely become quite loose—don’t worry, the dry ingredients will stabilize it in the next step. Blackstrap molasses is preferred here for its intensely dark, slightly bitter flavor, which is a perfect counterpoint to the sweetness.
The Crucial Step of Mixing in Flour: Once the flour mixture is introduced (Step 4), the baker must be vigilant about overmixing. Flour contains proteins that form gluten when hydrated and agitated. For a chewy, tender cookie, we want minimal gluten development. Switch the mixer to the lowest possible speed, or even consider folding the last half of the flour in by hand. Mix only until the last bit of white flour has disappeared into the dark dough. The dough will be dark, sticky, and soft. If you continue mixing past this point, the gluten strands elongate and tighten, resulting in a tough, dry, and potentially brittle cookie texture.
Chilling for Structure and Flavor: The chilling period (Step 5) serves two critical purposes: flavor maturity and dough management. As the dough rests, the spices and cocoa powder have time to fully hydrate, which deepens their flavor and mellows the raw flour taste. Structurally, the cooling process solidifies the butter and molasses. When the cold dough goes into the hot oven, the fat melts slower, delaying the spread of the cookie. This slow spread ensures a thicker center and prevents the cookies from becoming thin and crispy. If you are short on time, you can shape the dough into balls first, coat them, and then chill them on the baking sheet—this cuts the chilling time by about 10–15 minutes.
Shaping Technique and Coating: To achieve uniformly baked cookies, the dough balls must be uniform in size and density (Step 6). Use a cookie scoop (a 1.5-inch scoop is ideal) for consistency. Roll the scooped dough firmly between your palms to smooth out the surface before rolling it in the coating sugar. This rolling action gives the sugar something smooth to adhere to and prevents cracks from forming early in the baking process. The generous sugar coating is non-negotiable; it creates that lovely, crackled, slightly crunchy shell that provides an essential textural contrast to the soft center, sealing in the moisture.
Monitoring for Doneness and the Importance of Carryover Heat: The 9–11 minute baking time (Step 7) is quite short, and it’s the most important factor in achieving chewiness. Your cookies are done when the edges look set and just slightly firm, and the tops are cracked but the very center still looks soft and slightly underbaked. If you wait until the cookies look fully cooked in the oven, they will be overcooked once cooled. The moment they are removed, the residual heat from the baking sheet continues to cook the base and center gently—this is carryover heat (Step 8). The critical 5-minute rest on the hot pan allows the internal temperature to rise just enough to fully set the structure without drying out the interior. Transferring them too early can cause them to collapse or break.
Pro Tips for the Best Chewy Chocolate Gingerbread Cookies
- Temperature Control for Fat: While traditional creaming calls for softened butter, aiming for butter that is cool but malleable (about 65°F / 18°C) is key here. This slightly cooler temperature allows the butter to hold the maximum amount of air during creaming, which translates directly to a softer, thicker final cookie that resists spreading excessively.
- Double-Pan Baking: If you find the bottoms of your cookies are consistently browning or burning before the centers are cooked, try placing a second, empty baking sheet directly beneath the one with the cookies. This creates an insulating layer that shields the bottom of the cookies from direct heat, allowing them to bake more evenly.
- Use Parchment Paper Only: While silicone baking mats are great, parchment paper is actually better for these particular cookies. It provides a slightly better surface for the cookie dough to grip, which discourages excessive spread and helps maintain that desirable puffed, chewy center.
- Humidity Check: If you live in a very humid environment, your all-purpose flour might already contain more moisture. To compensate, consider reducing the flour by 1-2 tablespoons, or add an extra 5 minutes to the chilling time to help the dough firm up sufficiently before baking.
- Re-Roll Leftover Sugar: If you have unused granulated sugar from the coating process, you can save it. However, it’s generally best to discard any excess sugar that has come into contact with the raw dough to maintain freshness and safety for future use.
- The Fresh Grate Option: For an exceptional burst of aroma, grate a small amount of fresh nutmeg and cinnamon bark using a microplane, rather than relying solely on pre-ground spices. The difference in potency and flavor depth is astounding, particularly for the cloves and nutmeg, which are often stale in pre-ground form.
- The Day-After Flavor: These cookies are one of the few baked goods that improve slightly the day after they are baked. The spices deepen, and the texture softens further. Plan to bake them a full 12–24 hours before you plan to serve them for maximum flavor impact.
Variations and Substitutions
This recipe for Chewy Chocolate Gingerbread Cookies offers a fantastic base for customization. Here are several ways to tailor the flavor and appearance for different occasions or dietary needs.
Adding Chocolate Pieces: For an extra layer of decadence, fold in about ¾ cup of high-quality semi-sweet or dark chocolate chips after the flour is just mixed in. For a professional-looking result, chop up a 4-ounce bar of bittersweet baking chocolate into small, rough chunks; the varied sizes will create beautiful, melted pockets throughout the cookie. The intense, deep cocoa notes of the dark chocolate chips complement the bitterness of the molasses and the warmth of the ginger and cinnamon perfectly. If you are baking these around Christmas, consider using white chocolate chunks, which offer a sharp, creamy contrast to the dark cookie base.
Creating a Powdered Sugar Coating: Instead of the granulated sugar coating, which creates a crunch, you can roll the cookies in powdered sugar for a more rustic, snowy finish. After rolling the dough balls, chill them for 15 minutes. Then, roll them generously in powdered sugar. Bake as directed. Upon cooling, roll them a second time in powdered sugar. The double coating ensures the ‘snowy’ look remains after the first layer absorbs moisture and melts during baking. This is often referred to as a “crinkle” cookie variation.

Dairy or Egg-Free Adaptations: To make this recipe dairy-free, substitute the unsalted butter with an equal amount of solid plant-based butter sticks. Ensure the substitute has a high-fat content for the best creaming results. For an egg-free version, replace the large egg with a ‘flax egg’ (1 tablespoon of ground flaxseed meal whisked with 3 tablespoons of water, left to sit for 5 minutes until gelled). This substitution works well due to the high moisture content already present from the molasses. Be aware that plant-based butter and egg substitutes may affect the texture slightly, often leading to a cookie that is marginally more tender.
Adding Citrus Zest: A bright note of citrus can cut through the richness of the chocolate and molasses. Add 1 tablespoon of finely grated orange zest (from about one large orange) to the wet ingredients along with the vanilla extract. The oil from the zest intensifies the aroma and adds a subtle, fragrant layer to the overall spice profile. Lemon zest can also be used, though it provides a sharper, more acidic background note. This variation is especially good when the cookies are paired with a cup of black tea.
Infusing the Fat: For a deeply aromatic experience, melt the butter in a saucepan over medium-low heat and add the ground spices (ginger, cinnamon, cloves, nutmeg). Stir for about two minutes until fragrant, being careful not to burn the spices. Cool the spiced butter mixture until it is fully solidified again (refrigerate for 30–45 minutes), then proceed with the creaming step. This process, often called “toasting” the spices, pulls the volatile oils out of the spices and infuses them directly into the fat, resulting in a more intense and complex flavor that permeates the entire cookie.
Serving Suggestions
These intensely flavored chocolate and ginger cookies are complex enough to stand alone, but they pair beautifully with simple accompaniments that enhance their spice and richness.
- A Classic Glass of Milk: The age-old pairing remains the best. A tall, cold glass of whole milk provides a comforting, soothing contrast to the deep spices and rich chocolate notes of the cookie, cleaning the palate between bites.
- Warming Hot Chocolate: Serve these cookies alongside a mug of European-style hot chocolate—a thick, dark, and less-sweet version. The double dose of chocolate, one warm and one in cookie form, is an exceptional cold-weather treat, offering a deeply satisfying warmth.
- Ginger Ice Cream Sandwich: For a decadent, textural dessert, take two cooled cookies and sandwich a scoop of high-quality vanilla bean or a complementary salted caramel ice cream between them. The contrast between the soft, spiced cookie and the frozen cream is exceptional and makes for an easy gourmet dessert.
- Simple Mascarpone Dip: Instead of a heavy frosting, whisk together a tub of plain mascarpone cheese with a tablespoon of maple syrup and a pinch of cinnamon. Serve the cookies alongside this light, tangy dip. The creaminess and subtle sweetness of the mascarpone highlight the complexity of the spices without overwhelming the chocolate base.
Frequently Asked Questions
Why did my cookies spread too much and end up thin? Excessive spreading is typically caused by butter that was too warm during the creaming stage, insufficient chilling time, or inaccurate measurement of the flour (often due to packing the flour too tightly). Ensure your butter is cool-but-pliable, chill the dough for at least 30 minutes, and use the ‘spoon and level’ method for flour (lightly spoon the flour into your measuring cup, then level off the excess) rather than scooping directly from the bag.
Can I freeze the baked cookies? Yes, these cookies freeze very well. Ensure they are completely cooled, then stack them with small squares of parchment paper between layers and place them in a freezer-safe, airtight container. They can be frozen for up to two months. Thaw them overnight at room temperature in the container to maintain their moisture content and chewy texture.
Is it possible to make this dough by hand without a mixer? You can certainly make this dough by hand, though it will require more effort. Use a sturdy whisk to cream the butter and sugars, ensuring you beat for 5–7 minutes until the mixture visibly lightens and increases in volume. Once you add the flour, switch to a wooden spoon or spatula, folding the ingredients gently until just combined. Hand-mixing also reduces the risk of overmixing the flour.
What is the best way to ensure the cookies remain chewy after storage? The key to maintaining chewiness is moisture control. Always store the cooled cookies in a truly airtight container. A highly effective, old-school trick is to place half a slice of plain white sandwich bread inside the container with the cookies. The cookies will absorb the moisture from the bread, keeping them soft, while the bread will eventually dry out. Replace the bread every two days if needed.
Why does the recipe call for both granulated and brown sugar? The two types of sugar serve different purposes. Granulated sugar provides structure and contributes to the crisp edge and crackle. Brown sugar, which contains molasses, is hydroscopic (absorbs and holds moisture). This moisture retention is essential for the soft, pliable, and chewy center of the cookie. Using both ensures a balanced result—a touch of crispness on the outside with a substantial, moist chewiness inside.
PrintChewy Chocolate Gingerbread Cookies

A supremely soft and thick gingerbread cookie recipe featuring a double dose of ginger and rich Dutch-process cocoa for a perfect holiday treat.
Ingredients
2 ¼ cups all-purpose flour
¼ cup Dutch-process cocoa powder
1 teaspoon baking soda
1 ¼ teaspoons ground ginger
1 teaspoon ground cinnamon
½ teaspoon fine sea salt
¼ teaspoon ground nutmeg
¼ teaspoon ground cloves
1 stick unsalted butter, slightly cooled
1 tablespoon peeled and freshly grated ginger
½ cup dark brown sugar, lightly packed
½ cup unsulphured molasses
1 large egg, room temperature
1 teaspoon pure vanilla extract
8 ounces semisweet chocolate chips, divided
½ cup granulated sugar, for rolling
Instructions
1. Preheat the oven to 325°F (160°C). Line two standard baking sheets with parchment paper.
2. In a medium bowl, thoroughly whisk together all the measured flour, cocoa powder, baking soda, ground spices, and salt. Set aside.
3. In the bowl of a stand mixer, beat the slightly firm butter and the fresh grated ginger on medium speed for two minutes until fragrant.
4. Add the dark brown sugar and continue beating for 2 to 3 minutes until the mixture is lighter and fluffy.
5. Pour in the molasses, then the egg and vanilla extract, beating until homogenous.
6. With the mixer on low speed, gradually incorporate the dry ingredient mixture until just combined. Fold in three-quarters of the chocolate chips.
7. Use a 1 ½ tablespoon scoop to portion and roll the dough balls in granulated sugar. Dot with remaining chocolate chips.
8. Bake for exactly 10 minutes, or until the edges are set.
9. Allow the cookies to cool directly on the hot baking sheets for a full 5 minutes before transferring to a wire rack.
Notes
Use Dutch-process cocoa for the richest color and flavor.
For maximum chewiness, do not overbake the cookies.
Cookies can be frozen for up to 1 month after scooping and rolling.


