
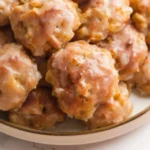
These Baked Apple Fritter Bites take everything you love about the classic fairground treat—that warm spice, the tender apple filling, and the unmistakable, sugary glaze—and transform it into a simple, oven-ready snack. Ditching the deep fryer doesn’t sacrifice any of the comforting flavor, instead delivering light, fluffy pieces that are perfect for a weekend brunch, an easy dessert, or even a late-morning indulgence alongside a strong cup of coffee. The secret is the precise mix of baking powder and buttermilk, which creates a beautifully airy texture without the oil saturation. They are sweet, warmly spiced, and come together faster than you might think.
The Necessary Components: Gathering Your Ingredients
The integrity of this recipe rests on having high-quality, fresh ingredients. Everything is measured using US volumetric standards, with optional gram weights for baking precision.
For the Apple Bites
- 2 cups (240 g) all-purpose flour
- 1/2 cup (100 g) granulated sugar
- 2 teaspoons baking powder
- 1/2 teaspoon baking soda
- 1 teaspoon ground cinnamon
- 1/4 teaspoon ground nutmeg
- 1/2 teaspoon fine sea salt
- 1 large egg, lightly beaten
- 1/2 cup (120 ml) buttermilk
- 1/4 cup (60 ml) unsalted butter, melted
- 1 teaspoon pure vanilla extract
- 1 cup (150 g) finely diced apples (Honeycrisp or Granny Smith are ideal)
For the Essential Glaze
- 1 1/2 cups (180 g) powdered sugar, sifted
- 3 tablespoons milk (whole milk preferred)
- 1/2 teaspoon pure vanilla extract

A Simple Flow: The Method for Baking
This method is designed for efficiency, ensuring you get from raw ingredients to glazed bites in under an hour.
- Prepare the Oven and Baking Pan: Preheat your oven to four hundred Fahrenheit. Grease a standard 12-cup muffin tin well, or line it with parchment paper squares if you prefer not to use liners.
- Combine Dry Elements: Whisk together the flour, sugar, baking powder, baking soda, cinnamon, nutmeg, and salt in a large mixing bowl until thoroughly blended.
- Mix Wet Elements: In a separate medium bowl, combine the beaten egg, buttermilk, melted butter, and vanilla extract.
- Form the Batter: Pour the wet ingredients into the dry ingredients. Stir gently until just combined. The batter should be thick and slightly lumpy. Fold in the diced apples carefully. Do not overmix.
- Portion and Bake: Scoop the batter into the prepared muffin tin, filling each cup about three-quarters of the way full. Bake for approximately 15 to 18 minutes, or until a wooden skewer inserted into the center of a bite comes out clean.
- Cool Slightly: Let the bites cool in the pan for five minutes before gently transferring them to a wire cooling rack.
- Whisk the Glaze: While the bites are cooling, combine the sifted powdered sugar, milk, and vanilla extract in a small bowl. Whisk until perfectly smooth and pourable.
- Glaze and Serve: Dip the tops of the still-warm (but not hot) baked apple fritter bites into the glaze, or drizzle the glaze over the tops. Allow the glaze to set for ten minutes before serving.

The Art of the Bake: Step-by-Step Details and Mastery
Achieving that fluffy, tender interior requires attention to a few sensory details throughout the mixing and baking process.
Perfecting the Apple Inclusion
The choice of apple is more impactful than you might think. A firm apple like a Honeycrisp or Granny Smith holds its shape and offers a pleasant, slightly tart counterpoint to the sweet batter. Ensure your dice is small—no larger than a quarter inch—so the pieces distribute evenly and soften appropriately in the brief baking time. Larger chunks risk creating a dense pocket in the middle of the bite. If you use a softer apple, consider peeling it entirely to avoid a chewy skin texture.
The Gentle Hand with the Batter
This is perhaps the most crucial stage. Baking powder and baking soda are the workhorses here, creating the necessary lift to mimic the fried puffiness. They rely on the acidity in the buttermilk. Once the wet and dry elements meet, you should stir only until the dry streaks of flour just disappear. The resulting batter will be thick, shaggy, and definitely lumpy—this is correct. Overmixing develops the gluten in the flour, which will result in a dense, tough baked fritter rather than the light, melt-in-your-mouth experience we are seeking. Stop stirring the second you incorporate the last of the flour.
Understanding the Visual Cues of Doneness
When the Baked Apple Fritter Bites near the 15-minute mark, keep a close watch. Visually, the edges of the bites should turn a deep golden brown, and the tops will feel firm to a light touch. The key indicator is the wooden skewer or toothpick test. When inserted deep into the center, it should emerge completely clean, perhaps with a few moist crumbs clinging to it, but no wet batter. If you notice a dark line of wet batter, return them to the oven for another two to three minutes. The internal temperature, if using a probe thermometer, should register two hundred Fahrenheit.
The Warm Glaze Transition
The trick to a beautifully set, crackly glaze is applying it while the baked bites are still warm. Not scalding hot—that will cause the glaze to melt and run off entirely—but warm enough that the heat helps the powdered sugar mixture bond to the surface instantly. Transferring them to a cooling rack is essential, as the open air underneath prevents the bottoms from becoming steamed and soggy while the tops are being glazed. Dip the tops quickly, or use a spoon to drizzle, creating elegant trails of sweet white glaze across the brown surface.

Practical Wisdom: Expert Baking Tips
Small adjustments can elevate these bites from good to truly exceptional.
- Sifting is Non-Negotiable for Glaze: Always sift your powdered sugar for the glaze. This eliminates any lumps that can make the final coating gritty or uneven. Sifting is the key to a smooth, glossy finish.
- Buttermilk Substitute: If you do not have buttermilk, you can create a simple substitute: add one tablespoon of white vinegar or fresh lemon juice to a liquid measuring cup, then fill it the rest of the way to the half-cup line with whole milk. Let it sit for five minutes until it curdles and thickens slightly.
- The Spice Boost: For a more profound apple pie flavor, toast your dry spices (cinnamon and nutmeg) gently in a small dry pan for about thirty seconds until fragrant before incorporating them into the flour. This wakes up the volatile oils.
- Don’t Overfill the Tins: Filling the muffin cups more than three-quarters full will cause the tops to mushroom too much and potentially touch, leading to an uneven shape. A properly filled cup gives you a nice, defined dome.
- Batch Glazing for Speed: If you are glazing a large quantity, place a wire rack over a sheet pan. Place all the bites on the rack, then pour the entire glaze mixture evenly over the top. This captures the excess glaze for re-use and speeds up the process significantly.
Creative Shifts: Recipe Variations and Substitutions
This base recipe is an excellent canvas for seasonal flavors and dietary adjustments.
- Maple Glaze: Substitute two tablespoons of the milk in the glaze recipe with two tablespoons of pure maple syrup. This adds a depth of molasses-like sweetness that pairs beautifully with the warm spices.
- Gluten-Free Flour: Use a one-to-one (1:1) gluten-free baking blend that contains xanthan gum. The method and amounts remain exactly the same, but the baking time may increase by a couple of minutes to ensure the center is set.
- Citrus Zest Addition: Introduce the bright, complementary flavor of citrus by adding one teaspoon of finely grated lemon or orange zest to the wet ingredients. This subtle lift cuts through the richness and spice.
- Nutty Crunch: Fold one-quarter cup of finely chopped toasted walnuts or pecans into the batter along with the diced apples for a pleasant crunch and added earthy flavor.
Presenting the Sweet Treat: Serving Suggestions
These bites are versatile enough for any time of day, but they truly shine when presented alongside simple, complementary sides.
- Brunch Board Centerpiece: Serve these warm on a large wooden board alongside a selection of mild cheeses, fresh berries, and crispy bacon. The sweet and savory contrast is highly appealing.
- A La Mode Dessert: For a decadent finish, serve two or three baked apple fritter bites in a small bowl, topped with a scoop of high-quality vanilla bean ice cream. A tiny dusting of cinnamon completes the look.
- Dipping Sauces: Present them with a selection of dips instead of the standard glaze, such as a caramel sauce, a whipped cream cheese frosting, or even a simple side of cinnamon-sugar butter.
- The Coffee Break: They are perfectly suited for an afternoon break. Simply serve them warm with a strong pour-over coffee or a robust tea.
Answering Your Apple Bite Questions: FAQs
We’ve compiled answers to the most common questions regarding these baked treats.
What is the best way to store the leftovers?
Store any remaining baked apple fritter bites in an airtight container at room temperature for up to two days. If you need to keep them longer, they can be refrigerated for up to four days, but they are best eaten fresh.
Can I make the batter ahead of time?
It is strongly advised not to make the batter ahead. The leavening agents (baking powder and soda) begin to activate immediately upon contact with the wet ingredients, and letting it sit will diminish its rising power. Mix the batter just before you intend to bake.
Why did my bites turn out dense and not airy?
The most common reason for a dense result is overmixing the batter. Excessive stirring develops the gluten and prevents the leavening agents from creating the proper gas pockets for lift. Ensure you only stir until the flour is just incorporated, leaving the mixture slightly lumpy.
Can I freeze the finished bites?
Yes, you can freeze them. Bake and cool the bites without the glaze. Once completely cooled, store them in a freezer-safe bag or container for up to three months. Thaw them at room temperature and then apply the freshly whisked glaze before serving.
Nutritional Information
| Nutrient | Amount per Serving |
| Calories | 285 kcal |
| Protein | 5 g |
| Carbs | 52 g |
| Fat | 7 g |
| Fiber | 1 g |
| Sugar | 31 g |
| Sodium | 190 mg |
Baked Apple Fritter Bites: A No-Fry Twist
These Baked Apple Fritter Bites take everything you love about the classic fairground treat—that warm spice, the tender apple filling, and the unmistakable, sugary glaze—and transform it into a simple, oven-ready snack. They are perfect for a weekend brunch or easy dessert.
- Prep Time: 15 mins
- Cook Time: 20 mins
- Total Time: 35 mins
- Yield: 12 bites 1x
- Category: Dessert
- Method: Baked
- Cuisine: American
Ingredients
2 cups all-purpose flour
1/2 cup granulated sugar
2 teaspoons baking powder
1/2 teaspoon baking soda
1 teaspoon ground cinnamon
1/4 teaspoon ground nutmeg
1/2 teaspoon fine sea salt
1 large egg, lightly beaten
1/2 cup buttermilk
1/4 cup unsalted butter, melted
1 teaspoon pure vanilla extract
1 cup finely diced apples (Honeycrisp or Granny Smith)
1 1/2 cups powdered sugar, sifted
3 tablespoons milk
1/2 teaspoon pure vanilla extract
Instructions
1. Preheat your oven to four hundred Fahrenheit. Grease a standard 12-cup muffin tin well.
2. Whisk together all dry ingredients for the bites (flour, sugar, baking powder, etc.) in a large bowl.
3. In a separate bowl, whisk together the wet ingredients (egg, buttermilk, melted butter, and vanilla).
4. Pour the wet ingredients into the dry. Stir gently until just combined. Fold in the diced apples carefully. Do not overmix.
5. Scoop the batter into the prepared muffin tin, filling each cup three-quarters full. Bake for 15 to 18 minutes.
6. Let the bites cool in the pan for five minutes, then transfer them to a wire rack.
7. Whisk together the powdered sugar, milk, and vanilla for the glaze until smooth.
8. Dip the tops of the still-warm bites into the glaze, or drizzle over the top. Allow the glaze to set for ten minutes before serving.
Notes
Do not overmix the batter to ensure a light, fluffy texture.
Use a 1:1 gluten-free flour blend as a substitution if needed.
Store leftovers in an airtight container at room temperature for up to 2 days.
Nutrition
- Serving Size: 1 bite
- Calories: 285
- Sugar: 31g
- Sodium: 190mg
- Fat: 7g
- Saturated Fat: 3g
- Fiber: 1g
- Protein: 5g


