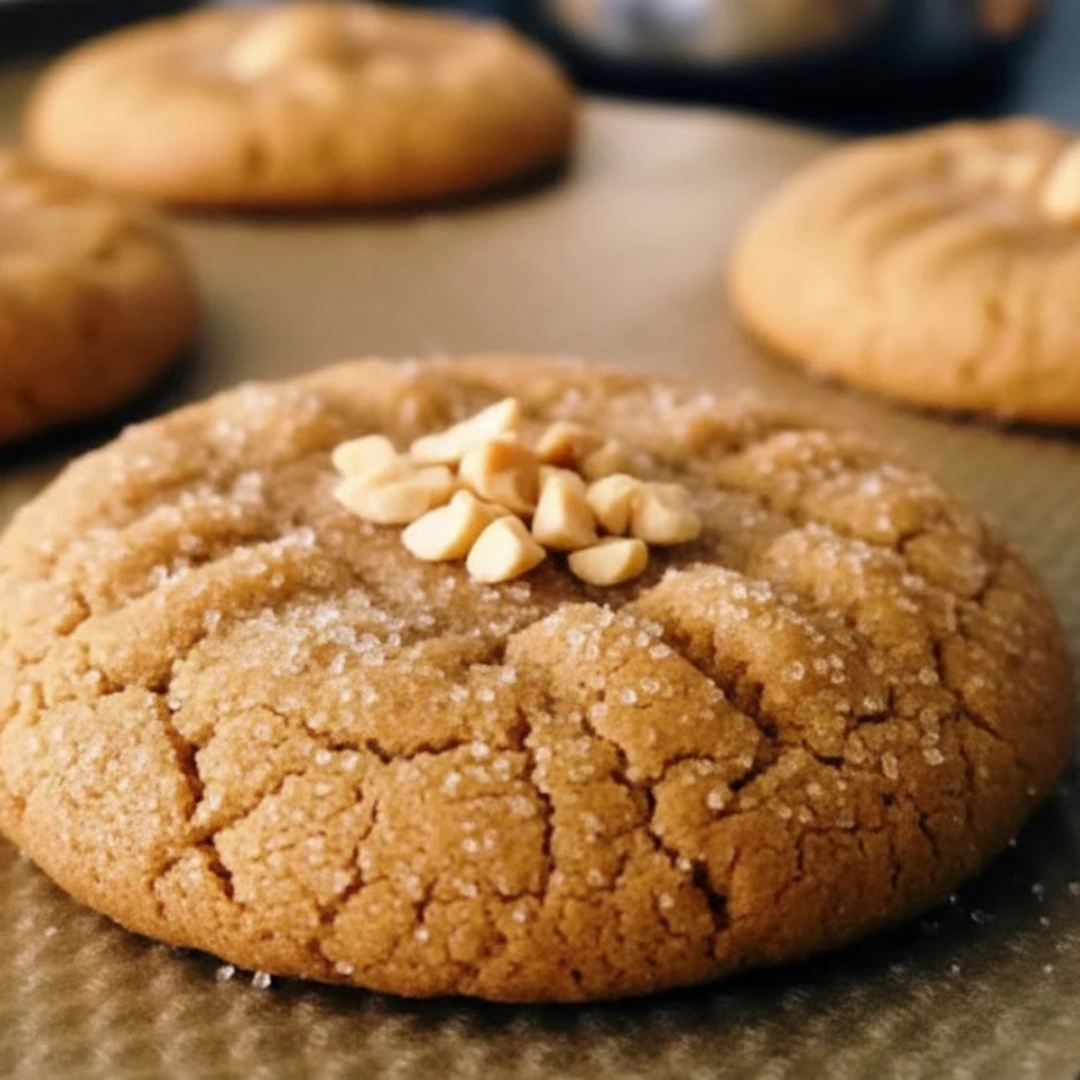
There is an elegant simplicity to a recipe that achieves profound flavor with minimal effort, and these 3-Ingredient Peanut Butter Cookies are the ultimate expression of that philosophy. With just a pantry-staple trifecta—peanut butter, sugar, and egg—you can produce a batch of chewy, rich, and unmistakably nutty cookies in less time than it takes to preheat your oven. They are the perfect solution for a sudden craving, a quick school lunch addition, or a simple, satisfying treat to enjoy with a strong cup of coffee. The flavor profile is pure, unadulterated peanut butter, boasting a pleasing textural contrast between the soft interior and the delicate, crisp edges.
Table of Contents
The Essential Components
The success of this recipe hinges on the quality of your three star ingredients. Opt for a creamy, well-stirred peanut butter for consistency.
- 1 cup (250 grams) creamy or chunky peanut butter (not natural-style, oil-separated)
- 1 cup (200 grams) granulated white sugar
- 1 large egg

A Simple Sequence of Steps
This recipe moves quickly from bowl to oven. Have your ingredients measured and your baking sheet prepared before you begin mixing.
- Preparation: Preheat your oven to three hundred fifty Fahrenheit. Line a large baking sheet with parchment paper.
- Combine the Dry: Pour the sugar into a large mixing bowl.
- Add the Wet: Add the peanut butter and the egg to the sugar.
- Mix: Use a spatula or wooden spoon to stir the ingredients until a uniform, sticky dough forms.
- Shape: Scoop the dough using a tablespoon or a one and one half-inch cookie scoop. Roll each portion gently into a smooth ball.
- Place and Press: Arrange the dough balls on the prepared baking sheet, leaving about two inches of space between them. Use a fork to press a classic criss-cross pattern onto each cookie.
- Bake: Place the sheet in the preheated oven and bake for ten to twelve minutes.
- Cooling: Remove the cookies from the oven and let them cool on the baking sheet for five minutes before transferring them to a wire rack to cool completely.

Mastering the Texture: Step-by-Step Guidance
While the ingredient list is short, precision in technique is key to achieving that ideal peanut butter cookie texture—a perfect balance of chewiness and crumble.
The Mixing Process: Achieving Homogeneity
Start by ensuring your egg is at room temperature; this helps it emulsify more readily with the peanut butter and sugar, preventing a gritty final texture. The mixing itself should be thorough but not overdone. When you first combine the three elements, it will look sandy and loose. Continue stirring with conviction—the mixture will come together suddenly, transforming into a thick, uniform mass that pulls away cleanly from the sides of the bowl. Stop mixing immediately once no streaks of sugar or egg remain. Overmixing here can activate the gluten in the small amount of flour-like stabilizers in the peanut butter, leading to a tougher, less tender cookie.
Shaping and the Signature Criss-Cross
Using a cookie scoop ensures every cookie is the same size, which is vital for even baking. Roll the scooped dough gently between your palms to smooth out any cracks, creating a solid sphere. This helps them spread neatly. The iconic criss-cross pattern isn’t just for aesthetics; it’s a necessary structural step. Peanut butter cookie dough is dense and lacks the typical spread factors found in other cookie doughs (like extra butter or baking powder). Pressing with a fork flattens the dough and compresses it, facilitating even heat penetration and preventing the cookie from staying too thick and raw in the center. Press firmly, but not so hard that you hit the parchment paper.
Indicators of Doneness: Sight and Smell
Baking time is short, and cookies can transition from perfectly done to dry and overcooked quickly. Around the ten-minute mark, your kitchen should be filled with a warm, nutty aroma. Visually, look for the edges to be set, lightly golden, and slightly cracked. The centers, however, should still look slightly soft and maybe even a little puffy—do not wait until the center is completely firm, as the residual heat from the baking sheet will continue to cook them after they are pulled from the oven. This carry-over cooking is essential for achieving the chewy center.
The Critical Cooling Phase
Resist the urge to move the cookies immediately. When they first come out of the oven, they are extremely delicate and prone to breaking. Letting them rest on the hot baking sheet for five minutes allows the internal structure to firm up while the edges set completely. After this brief rest, use a thin, wide spatula to carefully transfer them to a wire rack. They must cool entirely on the rack to prevent steam from condensing beneath them, which would make the bottoms soggy.
Tips for a Consistent and Flavorful Outcome
Even the simplest recipes benefit from practiced technique. Keep these expert pointers in mind to ensure a perfect batch every time you make these beloved cookies.
- Peanut Butter Selection is Key: Use commercially prepared, fully emulsified peanut butter (like Jif or Skippy). Natural peanut butter, which separates into oil and solids, has a different fat and moisture ratio, leading to a dough that is often too oily or crumbly and cookies that spread excessively.
- The Weight of Sugar: For the most consistent results, weigh your sugar. A cup of granulated sugar can vary widely depending on how it’s measured and packed. Using a kitchen scale ensures the exact ratio of dry-to-wet ingredients is maintained.
- Prevent Sticking: While the cookies are naturally high in fat, the high sugar content can still cause them to stick. Always use parchment paper on your baking sheets; this guarantees easy removal and makes cleanup negligible.
- Don’t Rush the Criss-Cross: If your fork sticks when pressing the pattern, lightly dust the tines with flour or dip the fork briefly in sugar between presses. This ensures a clean, attractive pattern and prevents the dough from tearing.
- Temperature Consistency: If you are baking multiple batches, keep the dough chilled between batches. Warm dough spreads more quickly and unevenly, potentially leading to thin, brittle cookies.
- Salt Balance: If you are using unsalted peanut butter, consider adding a quarter teaspoon of fine sea salt to the dough. Salt brightens the flavor of the peanut butter and sugar, preventing the final product from tasting overly sweet or flat.
- The Freezer Test: If your dough feels too soft to roll, place the entire bowl, covered, in the refrigerator for about fifteen minutes. A slightly chilled dough is much easier to handle and shape.
Exploring Flavor Variations and Substitutions
Three ingredients provide a perfect blank canvas for subtle additions that change the profile without complicating the core process.
- The Chocolate Swirl: Immediately after the cookies come out of the oven, press a miniature peanut butter cup or a small chocolate kiss into the center of each. The residual heat will melt the chocolate slightly, bonding it to the warm cookie.
- A Touch of Vanilla: Add one teaspoon of pure vanilla extract to the wet ingredients. This classic addition deepens the overall flavor profile, rounding out the sweetness and enhancing the nutty notes.
- Textural Contrast: For a delightful crunch, fold in a half cup of finely chopped salted peanuts or mini chocolate chips right before shaping the dough. This adds both texture and a subtle hint of savory contrast.
- Brown Sugar Swap: Replace half of the white sugar with packed light brown sugar. This introduces molasses, making the cookies moister, chewier, and giving them a slightly deeper, caramelized flavor.
- Sugar-Free Option: For a lower-carb alternative, substitute the granulated sugar with a one-to-one granulated erythritol or monk fruit blend. Note that these substitutes may slightly alter the cookie’s final texture and browning, often requiring a minute or two less in the oven.
Perfect Pairings and Serving Suggestions
These simple cookies shine brightest when served alongside complementary beverages or incorporated into a more complex dessert setting.
- Classic Milk Dunk: Nothing beats the traditional pairing of a warm, slightly chewy peanut butter cookie with a tall, ice-cold glass of whole milk. The creaminess of the milk cuts through the richness of the peanut butter perfectly.
- Ice Cream Sandwich: Turn these into an effortless, sophisticated treat by sandwiching a scoop of vanilla bean, chocolate, or even espresso ice cream between two cooled cookies. Wrap them and freeze for thirty minutes for easier handling.
- The Coffee Break: Serve alongside a hot Americano or a dark roast coffee. The assertive bitterness of the coffee is an excellent counterpoint to the sweetness and richness of the peanut butter.
- Dessert Topping: Crumble a few cooled cookies over a bowl of plain Greek yogurt or a fruit parfait for a quick, textural, and satisfying crunchy topping.
Common Questions Answered
Can I use natural peanut butter instead of commercial?
It is strongly discouraged. Natural peanut butter (the kind that separates) has a much higher fat content relative to the solids, which often results in cookies that are oily, crumbly, and prone to spreading into thin, greasy puddles. If you must use it, you will likely need to significantly increase the amount of sugar or add a small amount of flour to absorb the excess oil.
Why did my cookies not spread at all?
If your cookies stayed too much in a ball shape, it is often due to either using too much peanut butter relative to the egg and sugar, or not pressing the criss-cross pattern deeply enough. Ensure your measurements are accurate, and remember that the fork press is necessary to help the dense dough flatten and bake evenly.
How long will these cookies stay fresh?
Stored in an airtight container at room temperature, these cookies will retain their quality and texture for up to five days. For longer storage, you can freeze the baked and fully cooled cookies for up to three months. Thaw them at room temperature before serving.
Can I make the dough ahead of time?
Yes, the dough holds up very well. You can mix the dough, roll the balls, press the criss-cross, and place them on a parchment-lined sheet. Cover the sheet and refrigerate the dough for up to two days. When ready to bake, place the cold dough directly into the preheated oven, adding one to two minutes to the total baking time.
My cookies are too dry. What went wrong?
The primary culprit for dry cookies is overbaking. Because the dough is naturally dense and low in moisture, even a minute or two extra in the oven can be detrimental. Pull them when the edges are set and the centers still look slightly soft. They will firm up as they cool. Always trust the visual cues over the clock if your oven runs hot.
Nutritional Breakdown
| Nutrient | Amount per Serving |
| Calories | 175 kcal |
| Protein | 5 g |
| Carbs | 18 g |
| Fat | 9 g |
| Fiber | 1 g |
| Sugar | 15 g |
| Sodium | 85 mg |
Disclaimer
Nutrition information is an estimate and may vary based on preparation and ingredients used.
PrintThe Quintessential 3-Ingredient Peanut Butter Cookies
This recipe for 3-Ingredient Peanut Butter Cookies produces a chewy, rich, and unmistakably nutty treat in under 20 minutes using just peanut butter, sugar, and one egg. It’s the ultimate quick dessert.
- Prep Time: 5 mins
- Cook Time: 12 mins
- Total Time: 17 mins
- Yield: 18 cookies 1x
- Category: Dessert
- Method: Baking
- Cuisine: American
Ingredients
1 cup (250 grams) creamy or chunky peanut butter (not natural-style, oil-separated)
1 cup (200 grams) granulated white sugar
1 large egg
Instructions
1. Preheat your oven to three hundred fifty Fahrenheit. Line a large baking sheet with parchment paper.
2. Combine the granulated white sugar, peanut butter, and the large egg in a large mixing bowl.
3. Stir the ingredients thoroughly using a spatula or wooden spoon until a uniform, sticky dough forms.
4. Scoop the dough using a tablespoon or a one and one half-inch cookie scoop. Roll each portion gently into a smooth ball.
5. Place the dough balls on the prepared baking sheet, ensuring two inches of space between them. Use a fork to create the signature criss-cross pattern.
6. Bake in the preheated oven for ten to twelve minutes. The centers should still look slightly soft.
7. Remove the cookies from the oven and let them cool on the baking sheet for five minutes. Then, transfer them to a wire rack to cool completely.
Notes
Always use commercially prepared peanut butter, not natural, separated styles.
For the best result, measure your sugar by weight (200 grams).
If your fork sticks when pressing the pattern, lightly dust the tines with flour or sugar.
Store leftovers in an airtight container for up to five days.
Nutrition
- Serving Size: 1 cookie
- Calories: 175
- Sugar: 15g
- Sodium: 85mg
- Fat: 9g
- Saturated Fat: 2g
- Unsaturated Fat: 5g
- Trans Fat: 0g
- Carbohydrates: 18g
- Fiber: 1g
- Protein: 5g
- Cholesterol: 11mg


